Using the iOS Trust App for Individuals
Last updated: May 13, 2026
This guide is for VectorCare Trust, our healthcare credentialing product.
This guide is designed to familiarize users with the main navigation and settings in the VectorCare Trust iOS app.
Trust iOS Tab Bar
The Trust iOS tab bar appears at the bottom of the app screen and is the main navigation hub within the Trust iOS app. Use this tab bar to quickly access a feature or tool.
Homepage
When you first log into the app, you will be taken to the Home page.
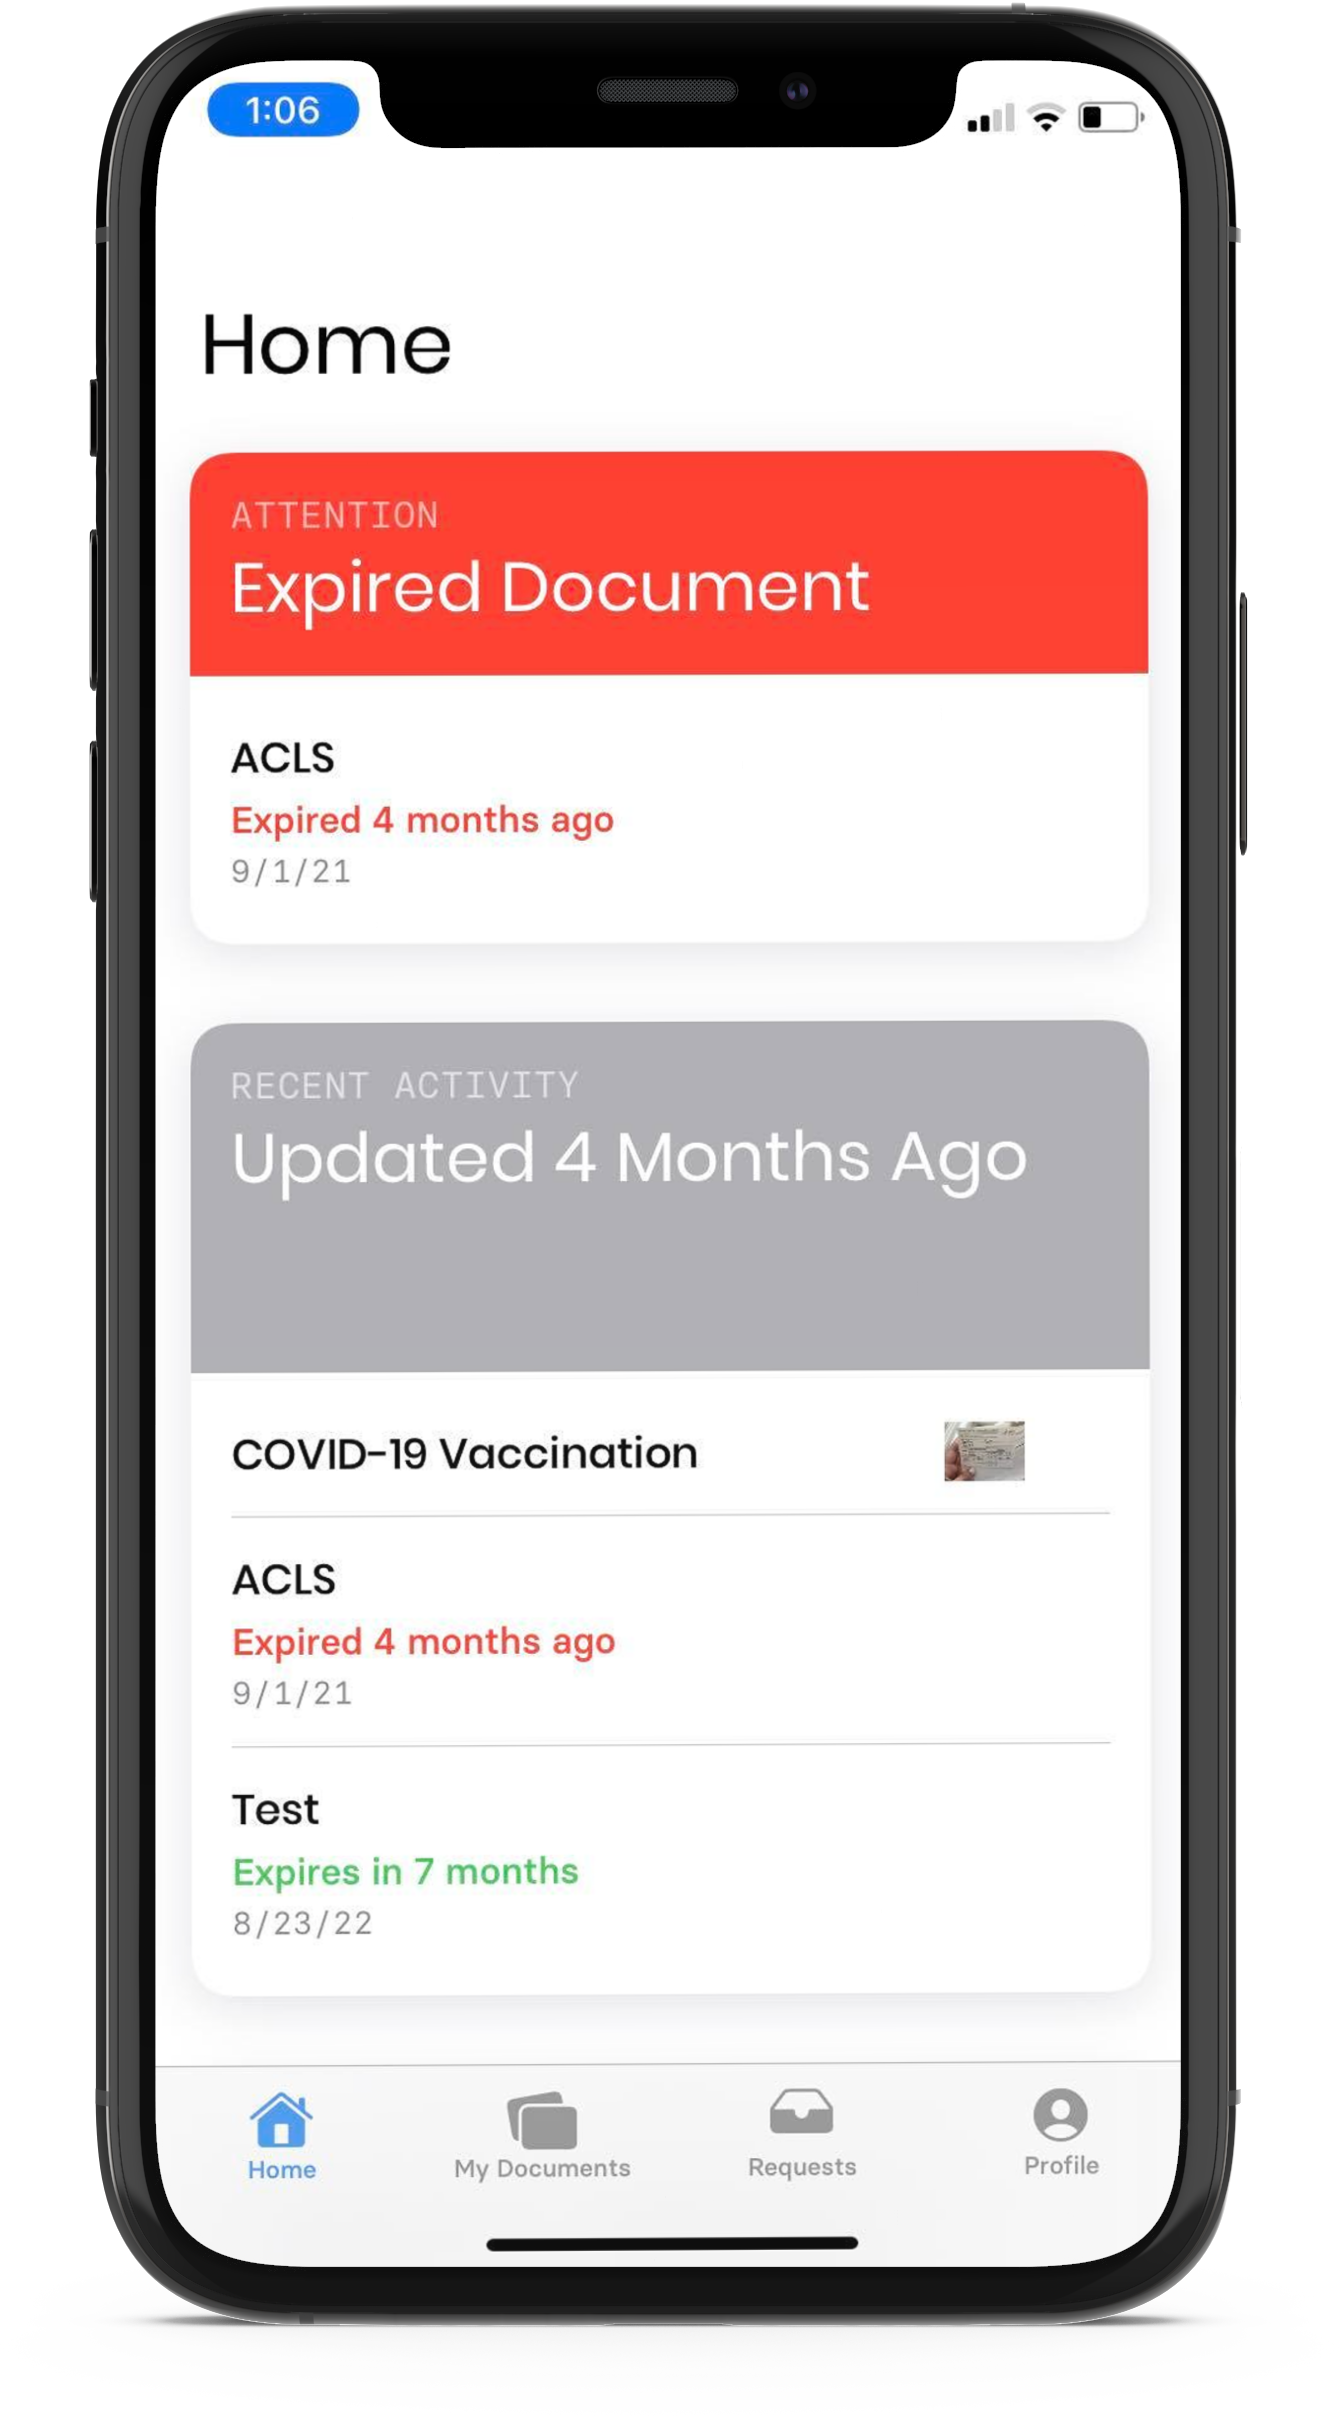
Here you will see a dashboard that offers shortcuts, tips and tricks on the following items:
Adding a new document
Updating the App
Requests that require attention
Expired documents
Upcoming expiring documents
Ability to add your profession for more specific template suggestions
Uploading a COVID19 card
Suggestions for popular document types
Referral and perks program information
My Documents Page
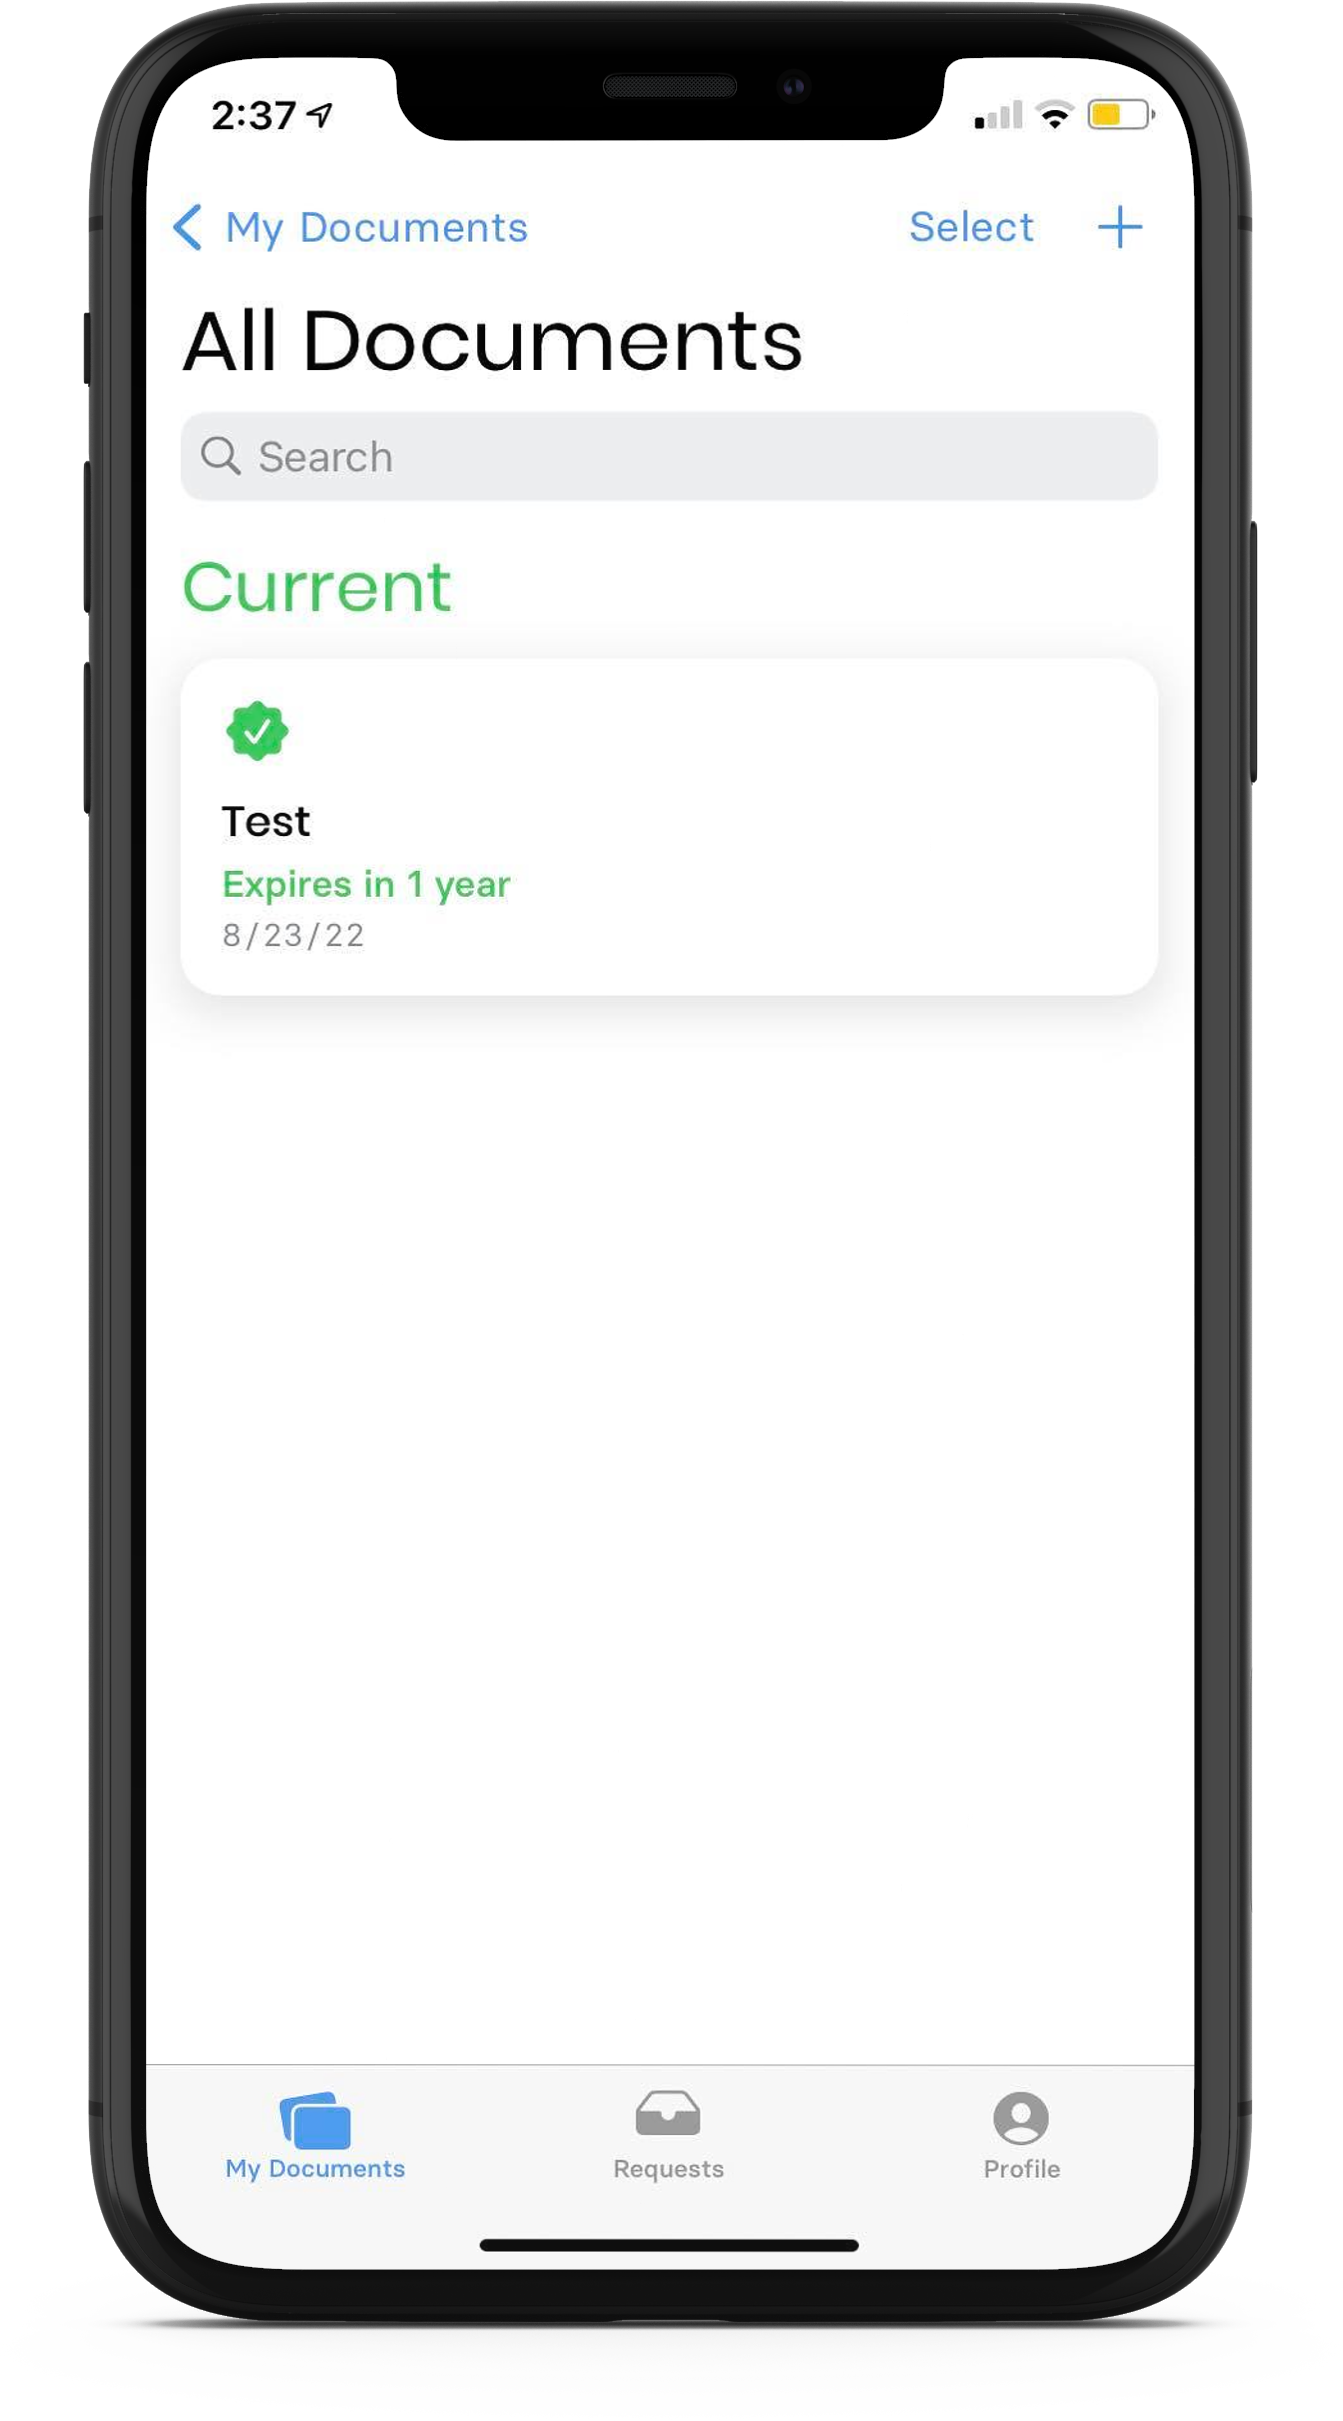
You can view all of your documents by tapping the My Documents button in the navigation bar.
The My Documents page allows you to view your documents based upon expiration status or based upon the document type.
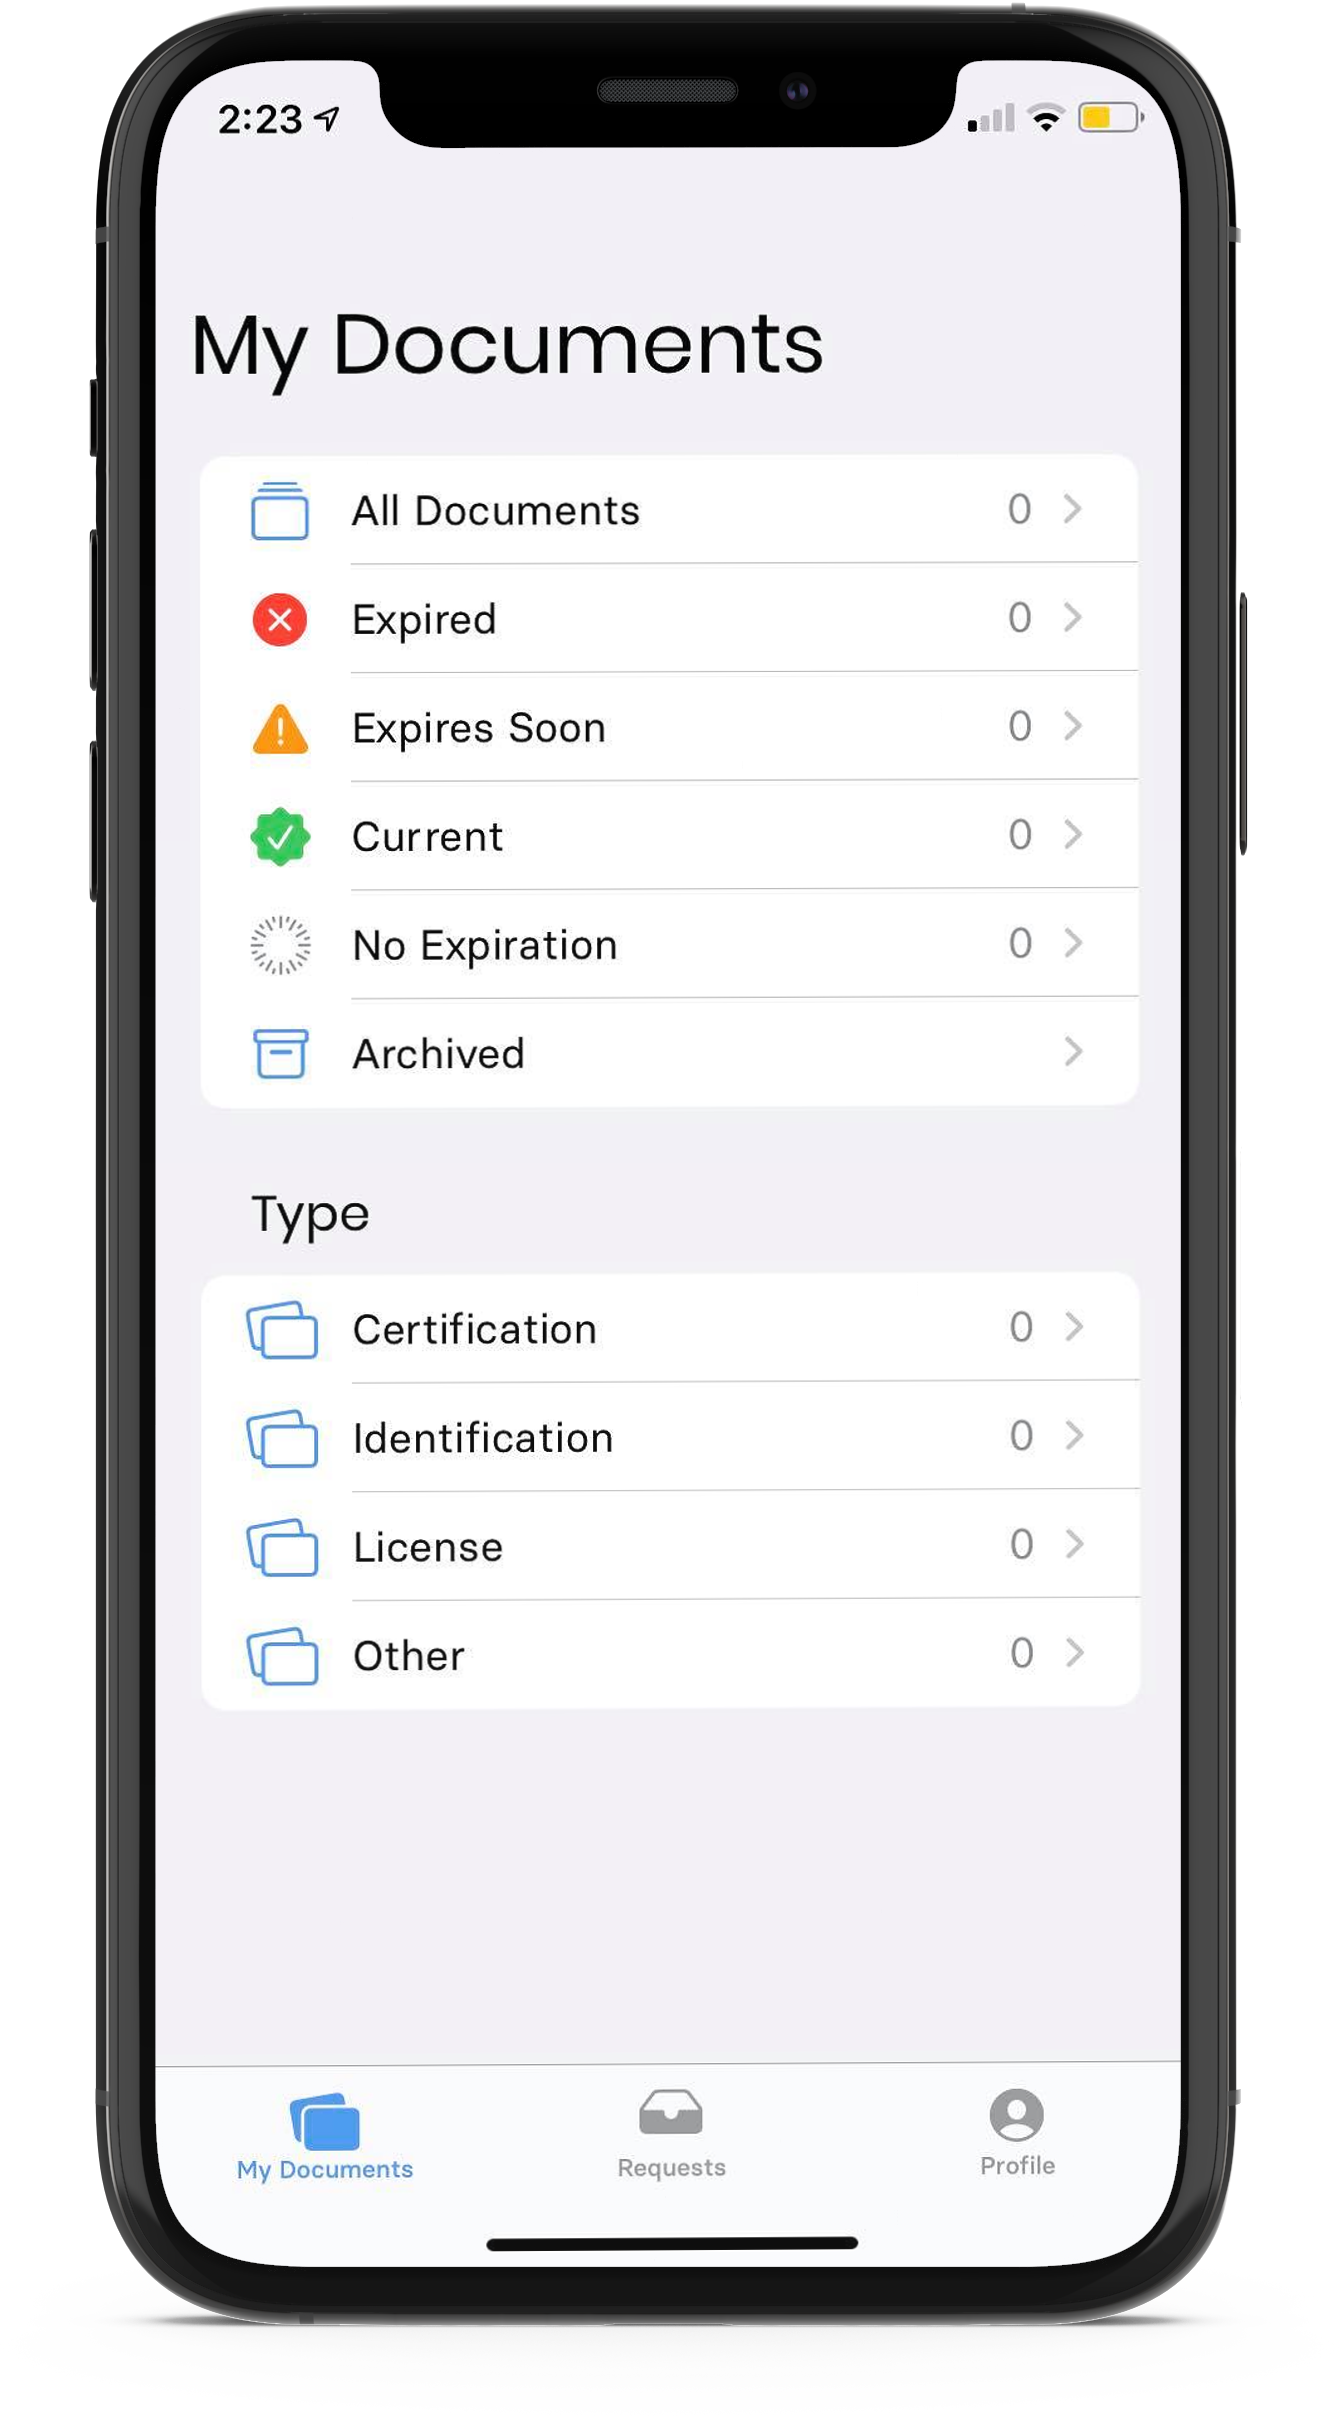
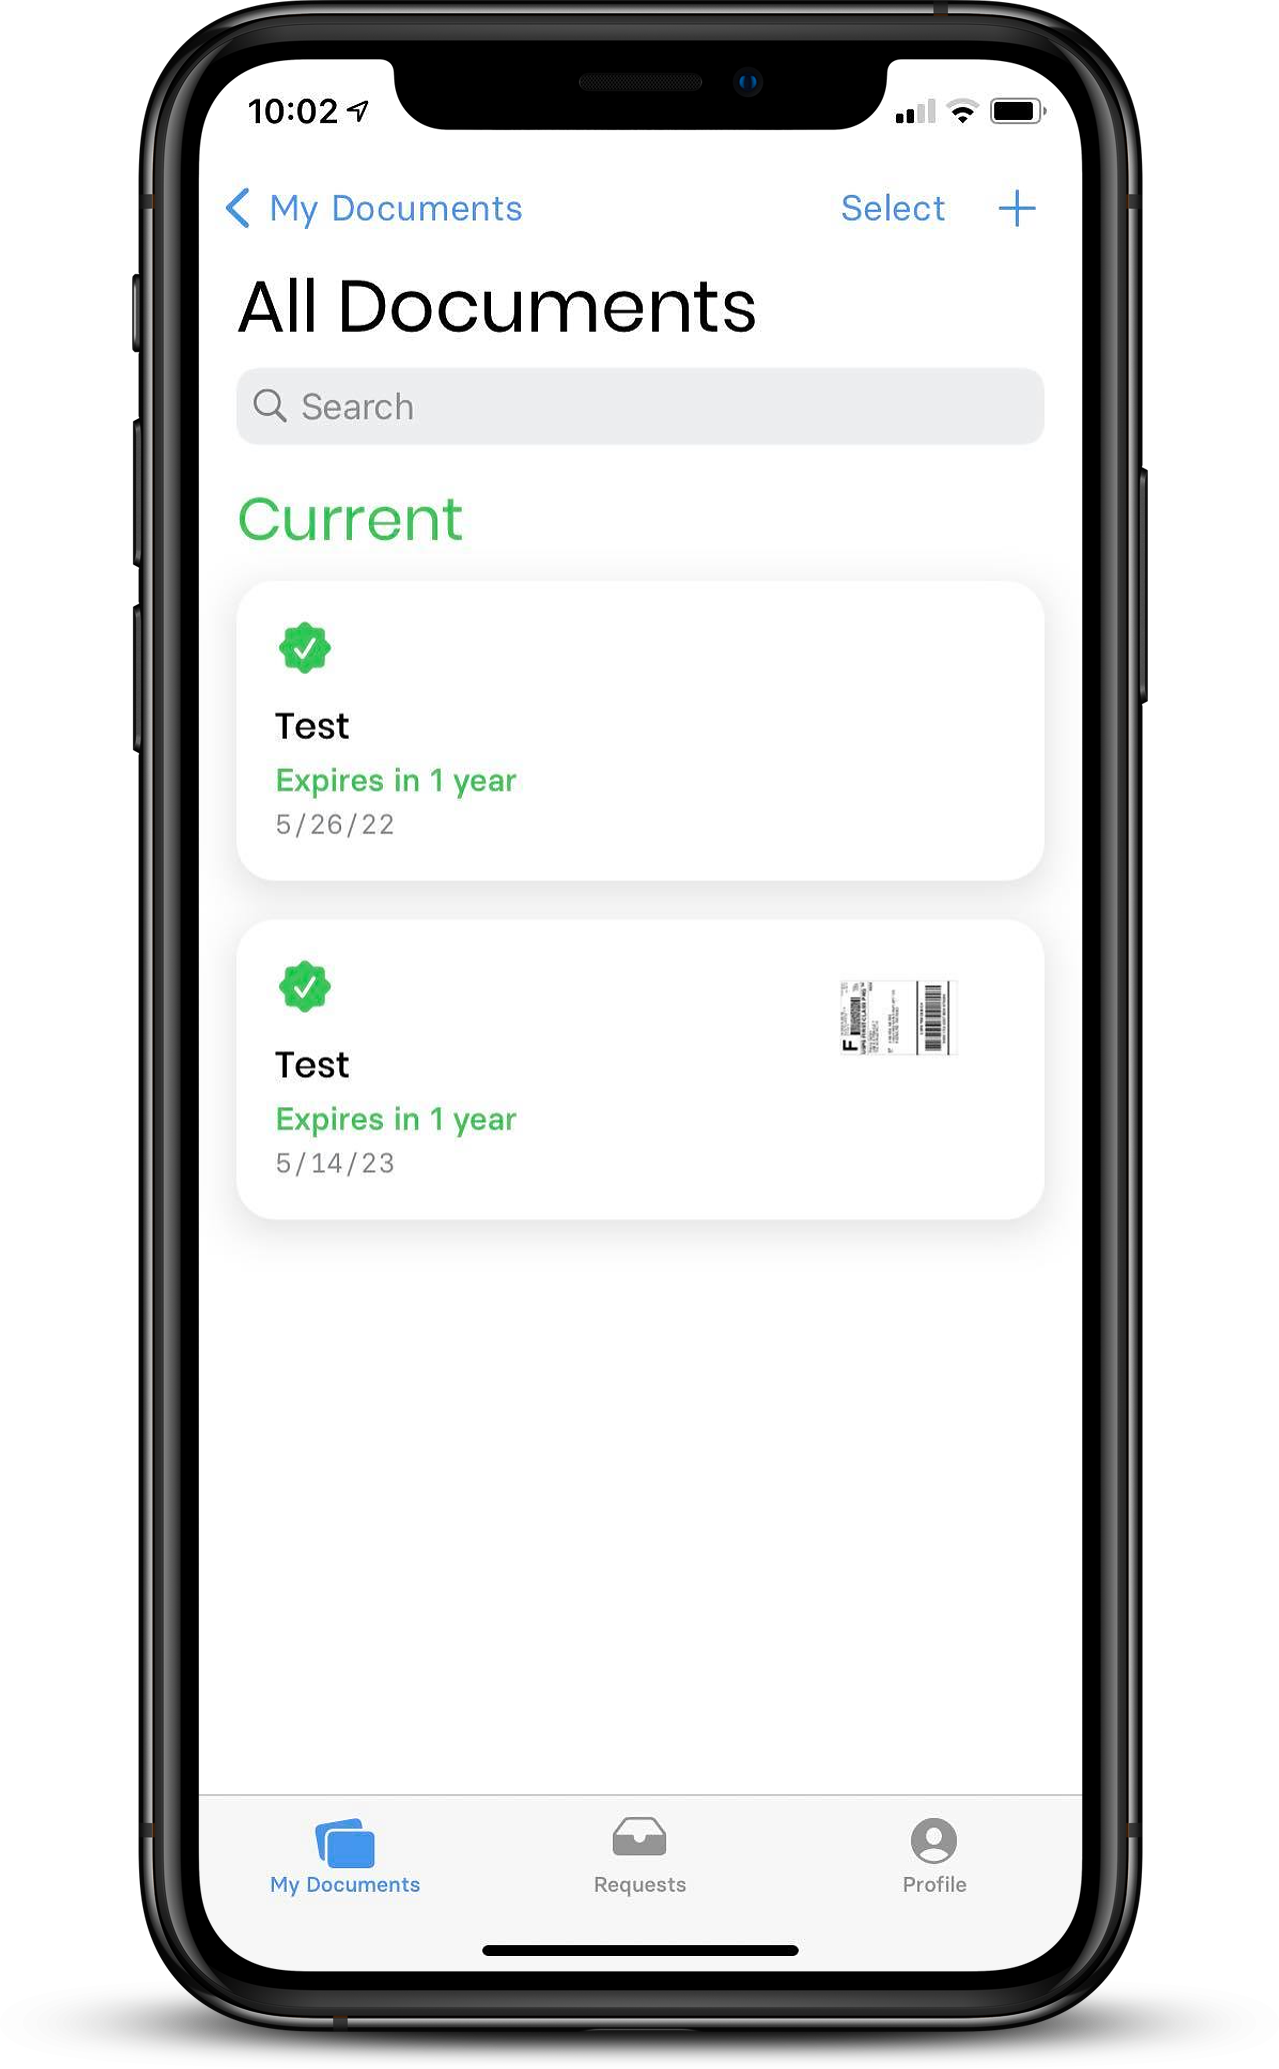
From this page, you will have the option to add new documents, view them, and remove them completely.
Adding New Documents
To add new documents, start by tapping the + sign in the top right corner.
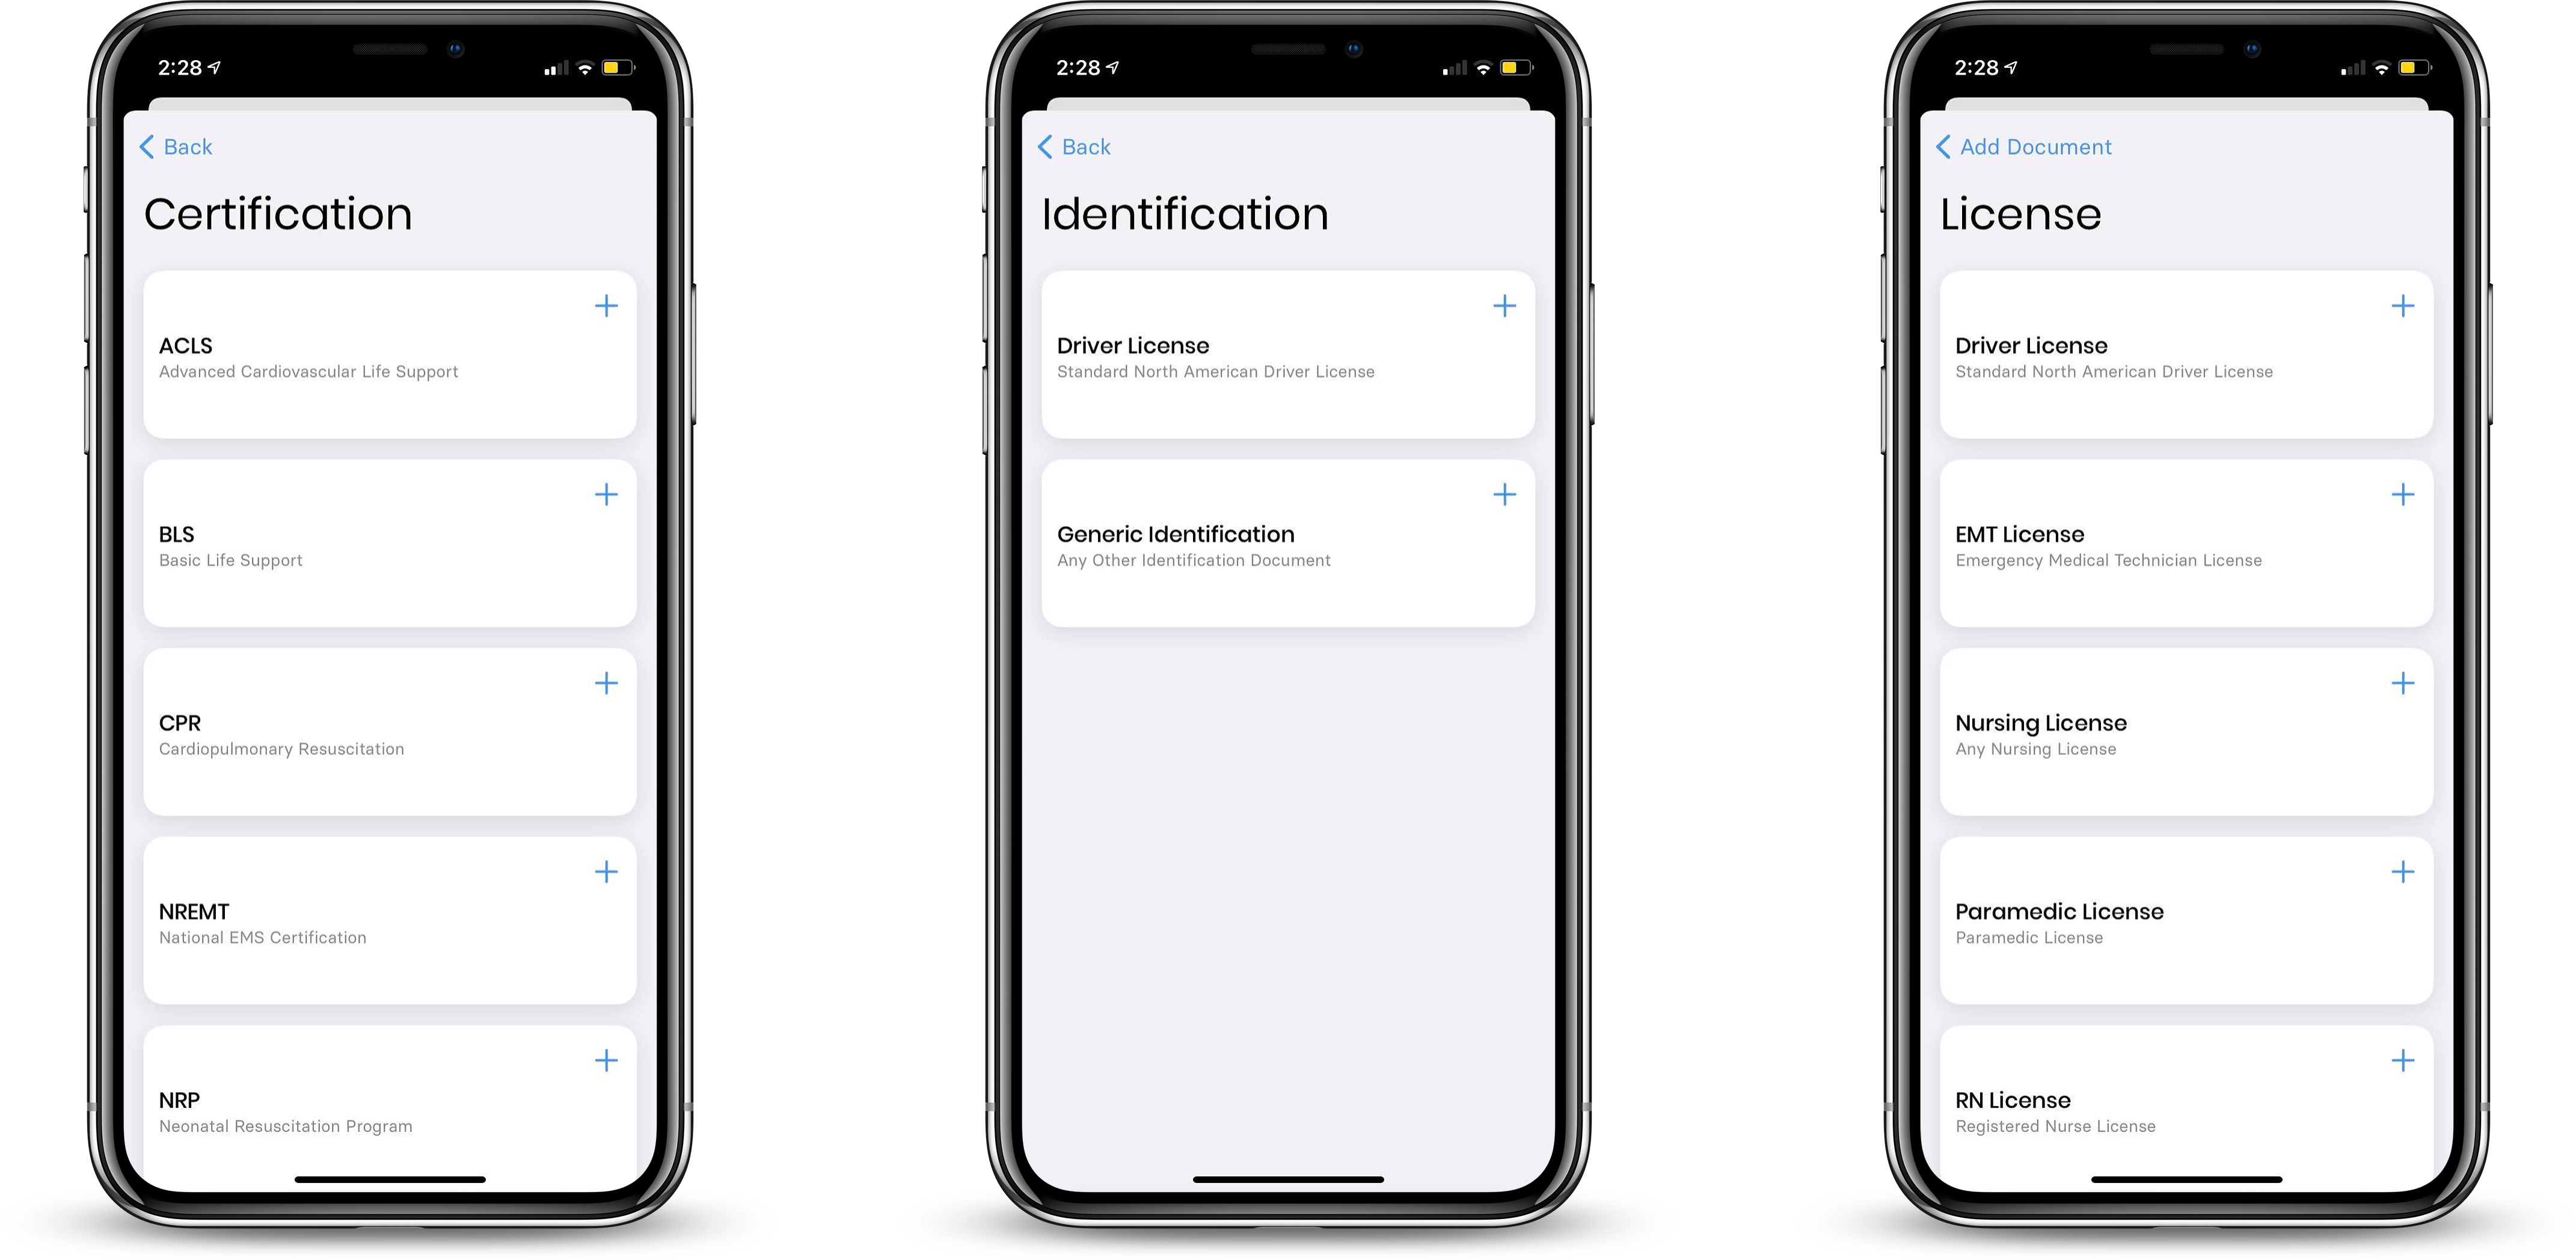
Next, choose the document category of the document you would like to upload (Certification, Identification or License or Other) and the sub-category (i.e. ACLS, BLS, etc.). Then you will be able to fill out any required fields.
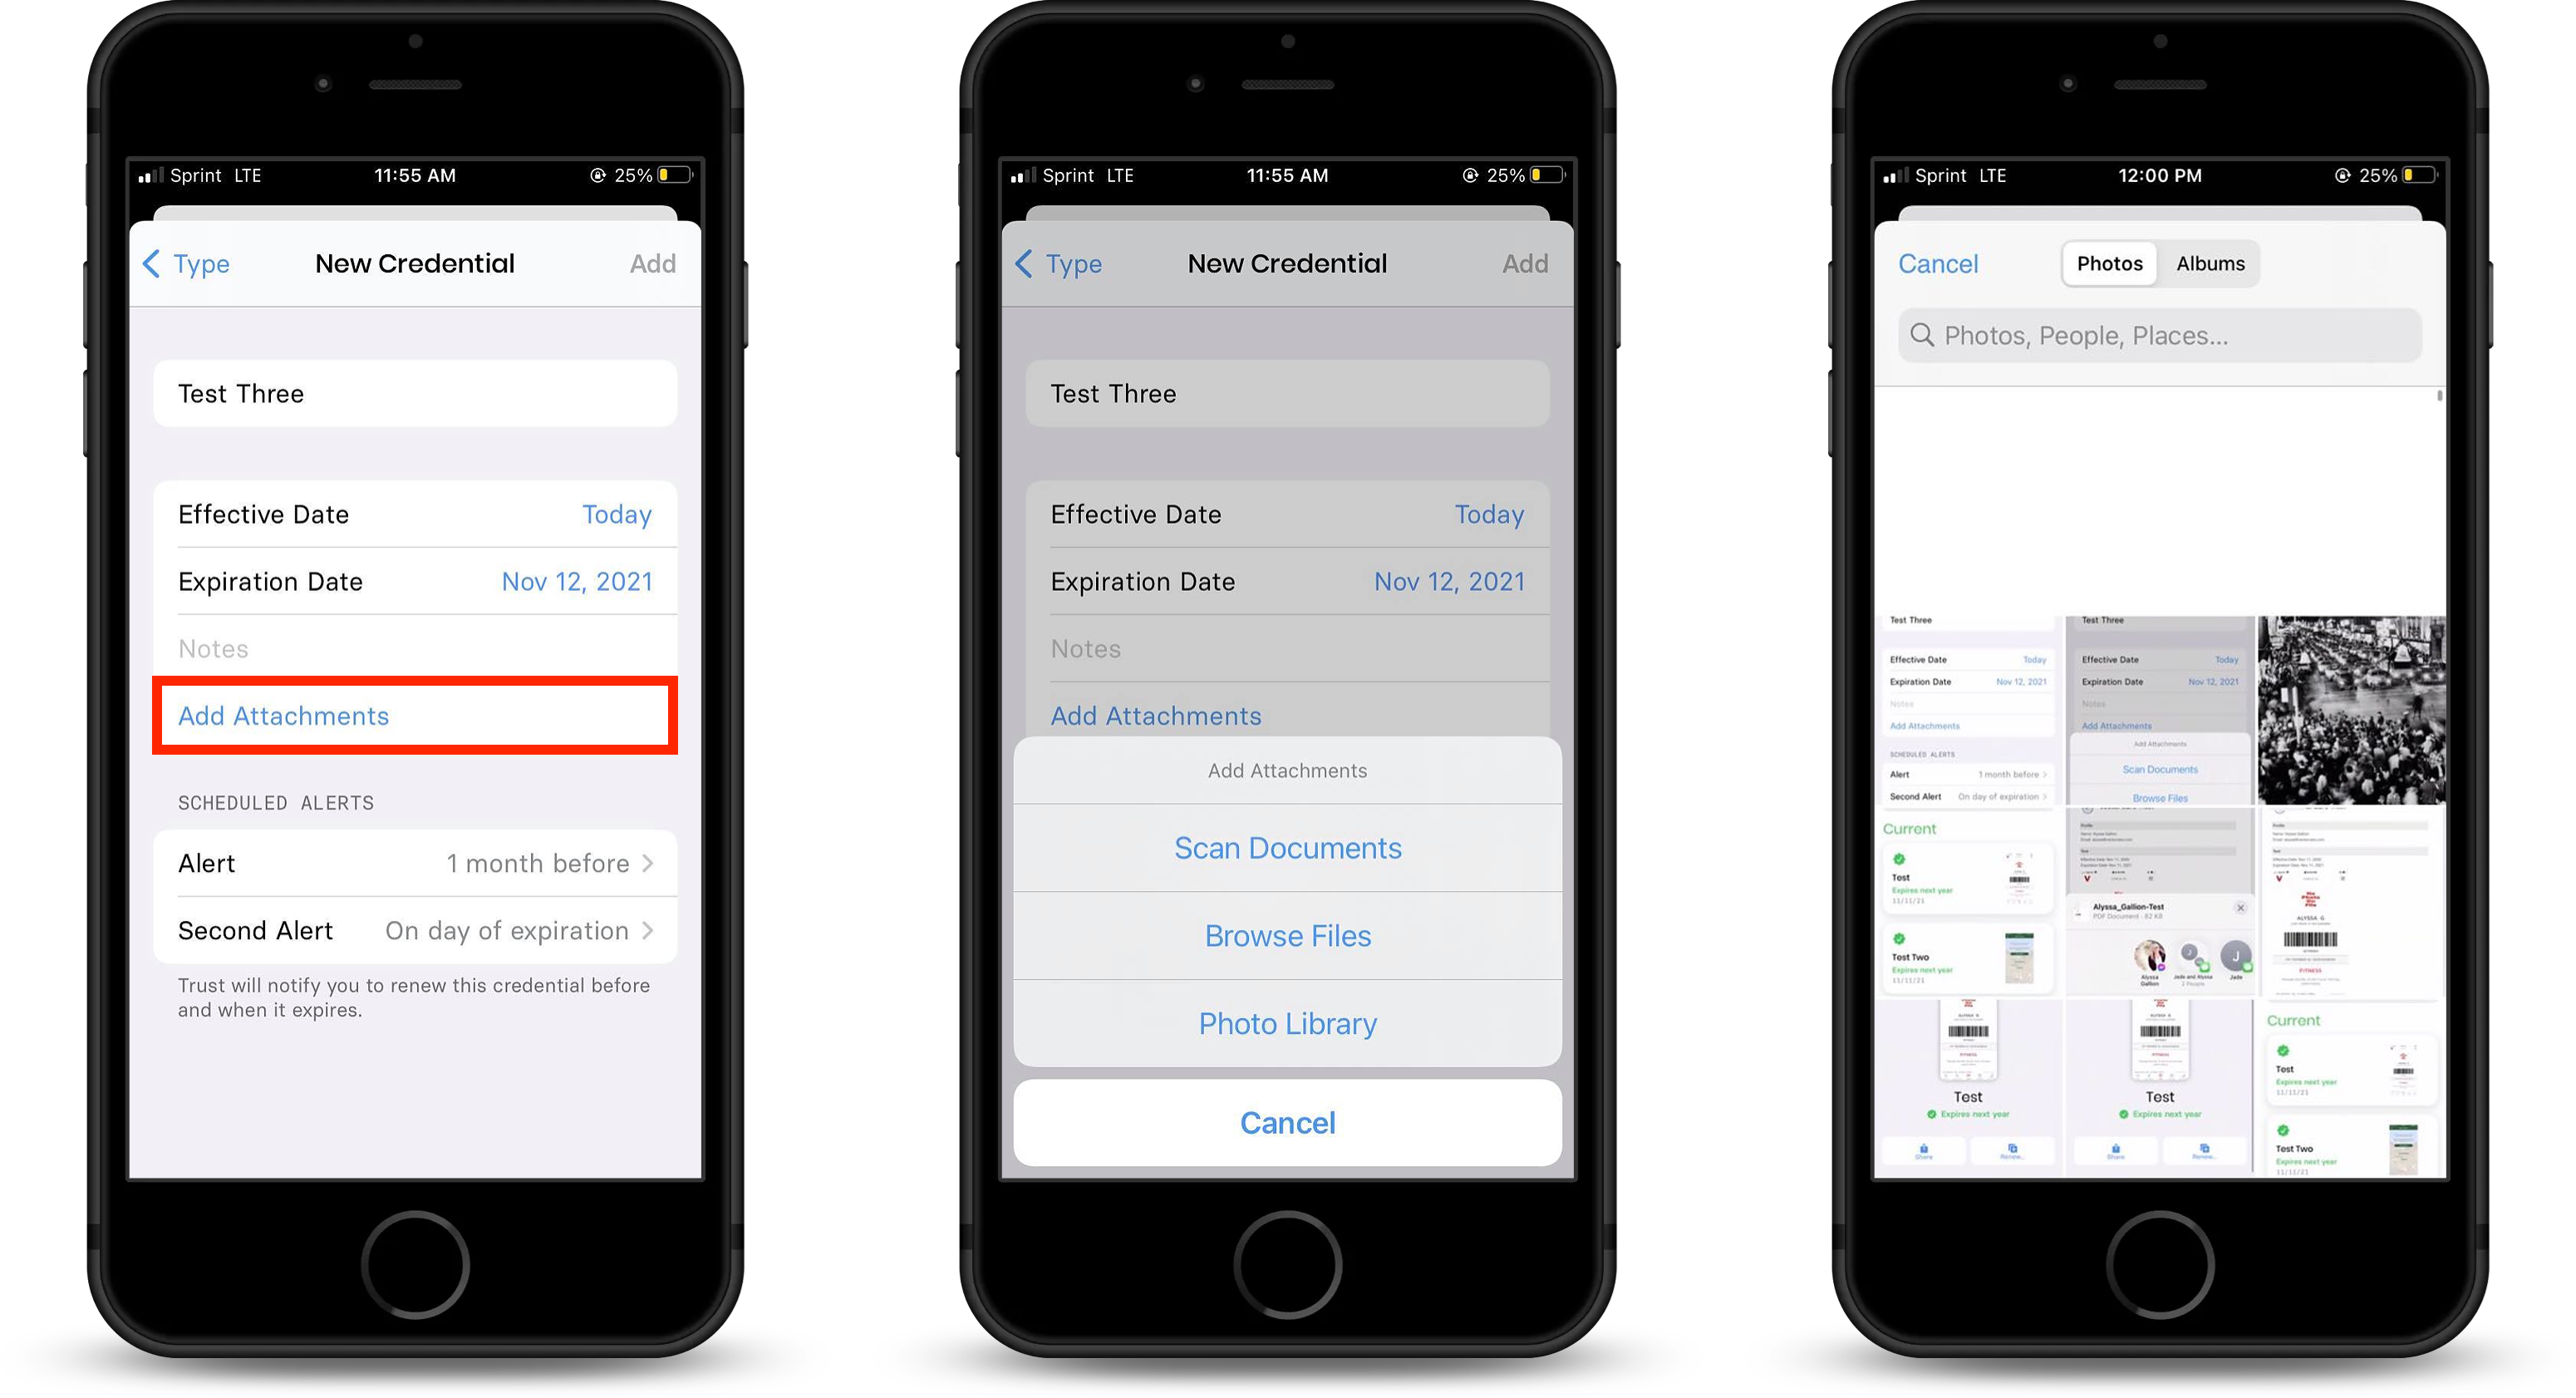
Form field definitions:
Document Name, Certification Name, or License Name: Name your document to identify it easily in the future
Issue or Effective date: The date this document became active
Expiration date: The date this document expires
Issuing Authority: This is the organization, association, board, etc. that is responsible for issuing the document
Notes: Any notes you’d like to provide about this document
Add Attachments: Upload the document here. Accepted file types are JPEG, GIF, PNG, JPG, plain text, TIFF, and PDF. Attachments are optional but are recommended.
Scheduled Alerts: You can add up to two alerts that will notify you when a document is about to expire
Once you have filled out all of the necessary fields, tap Add.
Adding Attachments
When uploading a document, users have the ability to scan documents, browse files, or choose a photo from their photo library. To add an attachment, tap Add Attachments and select the method that you will be using to upload the document or image. Next, tap the document or image you would like to upload, make any edits, and tap Done. Note: Attachments are not required, however, they are recommended.
Scanning Documents
Driver's License
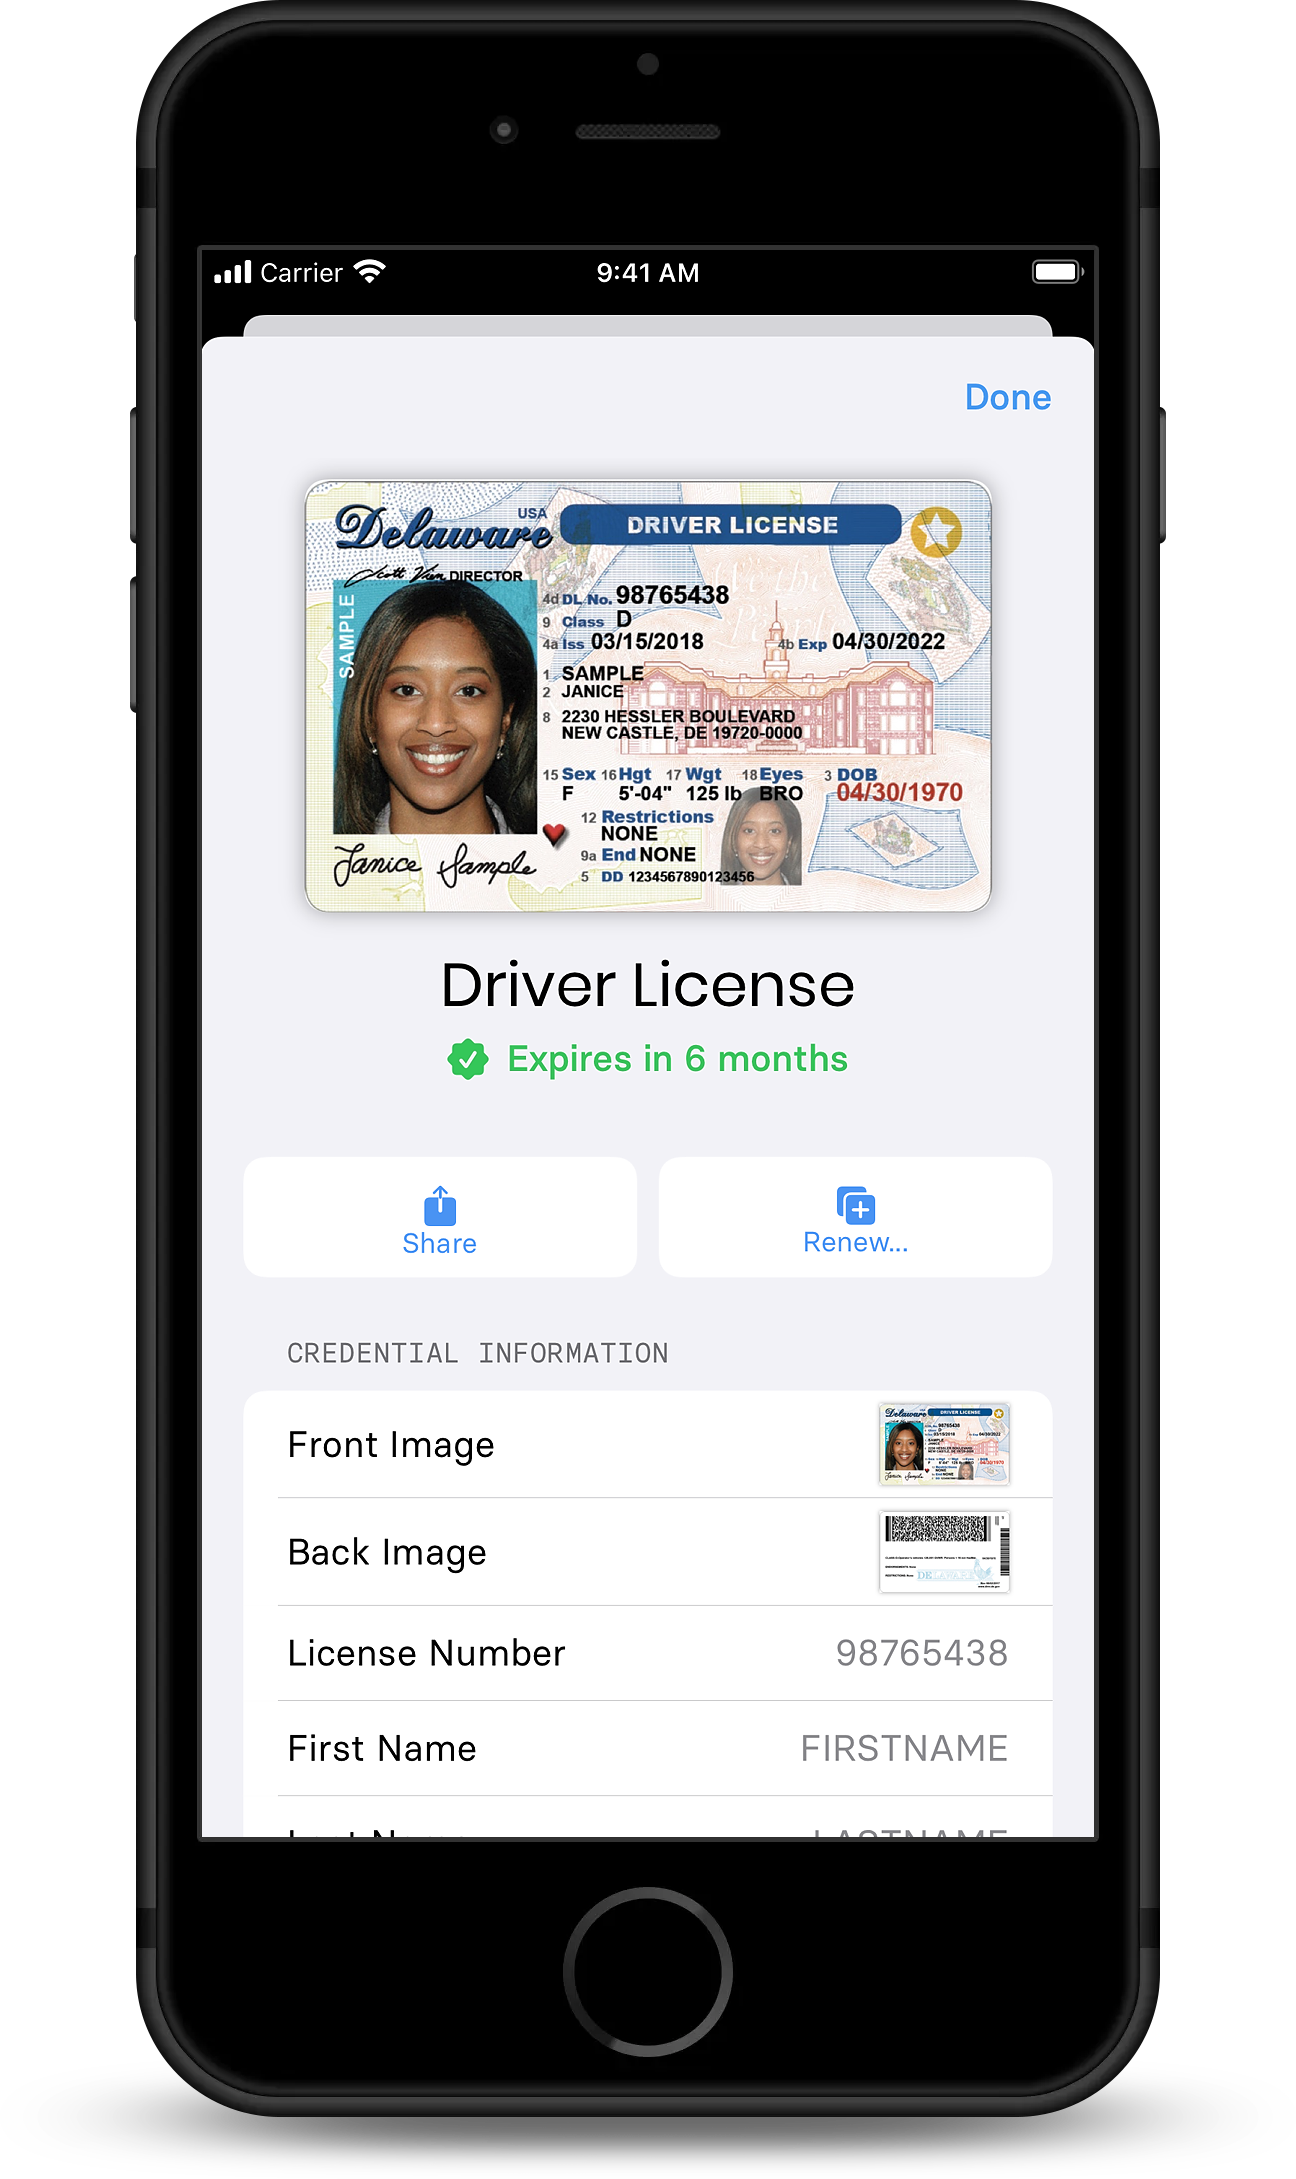
When scanning a Driver's License, the barcode is captured and auto-populates the remaining fields, reducing the time it takes for you to upload a document. If you choose to upload a Driver's License, you will need to scan both the front and back sides. To scan a Driver's License, select Scan Documents from the Add Attachments menu and tap Front Image.
Once you have taken a photo of the front side of your license, you have the option to tap Retake or Keep Scan. Once you are satisfied with the front image, repeat the process for the backside of the license. After both sides have been captured, tap Done.
Other Documents
To scan a document, tap Scan Documents from the Add Attachments menu. Once you have successfully taken a photo of your document, tap Save.
Viewing Documents
To view documents that you have uploaded, navigate to the My Documents tab on the tab bar. Here you can see a list of all documents which have been uploaded. To view a document, tap on the applicable document card.
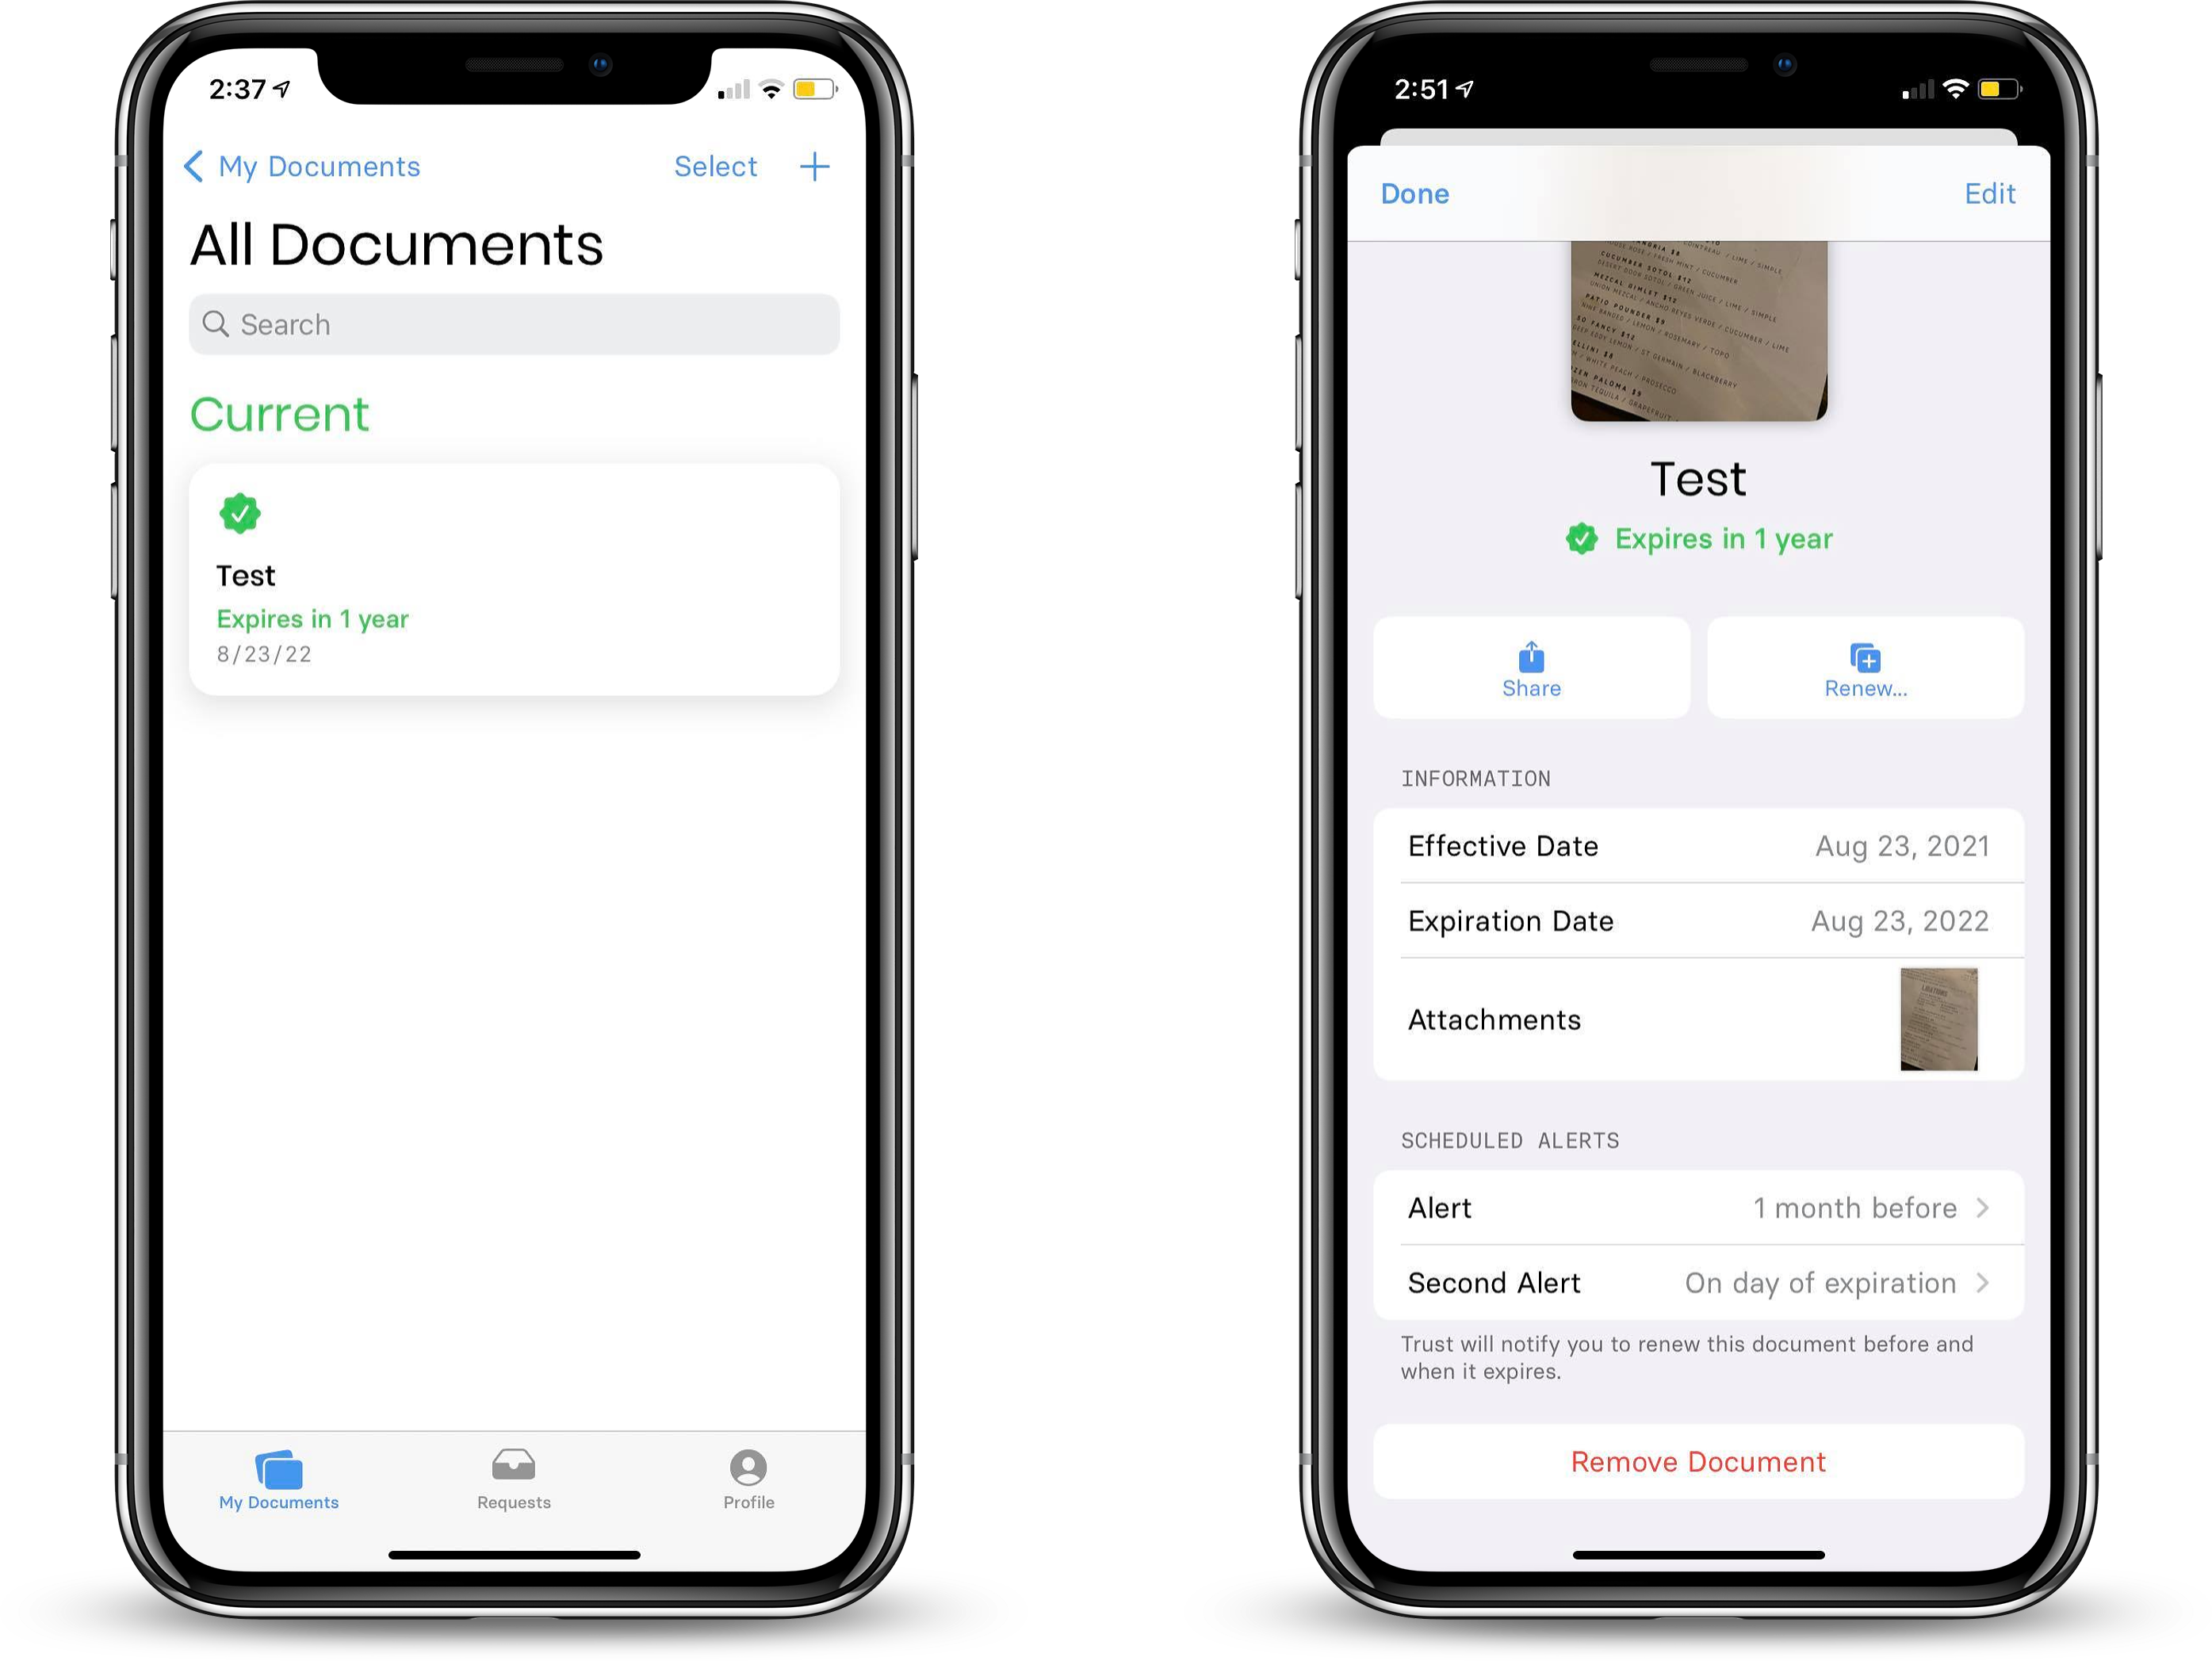
Each credential card includes a preview of the document details: title, effective date, expiration date, and notes. You also have the option to share, renew, or remove a document.
Sharing Documents
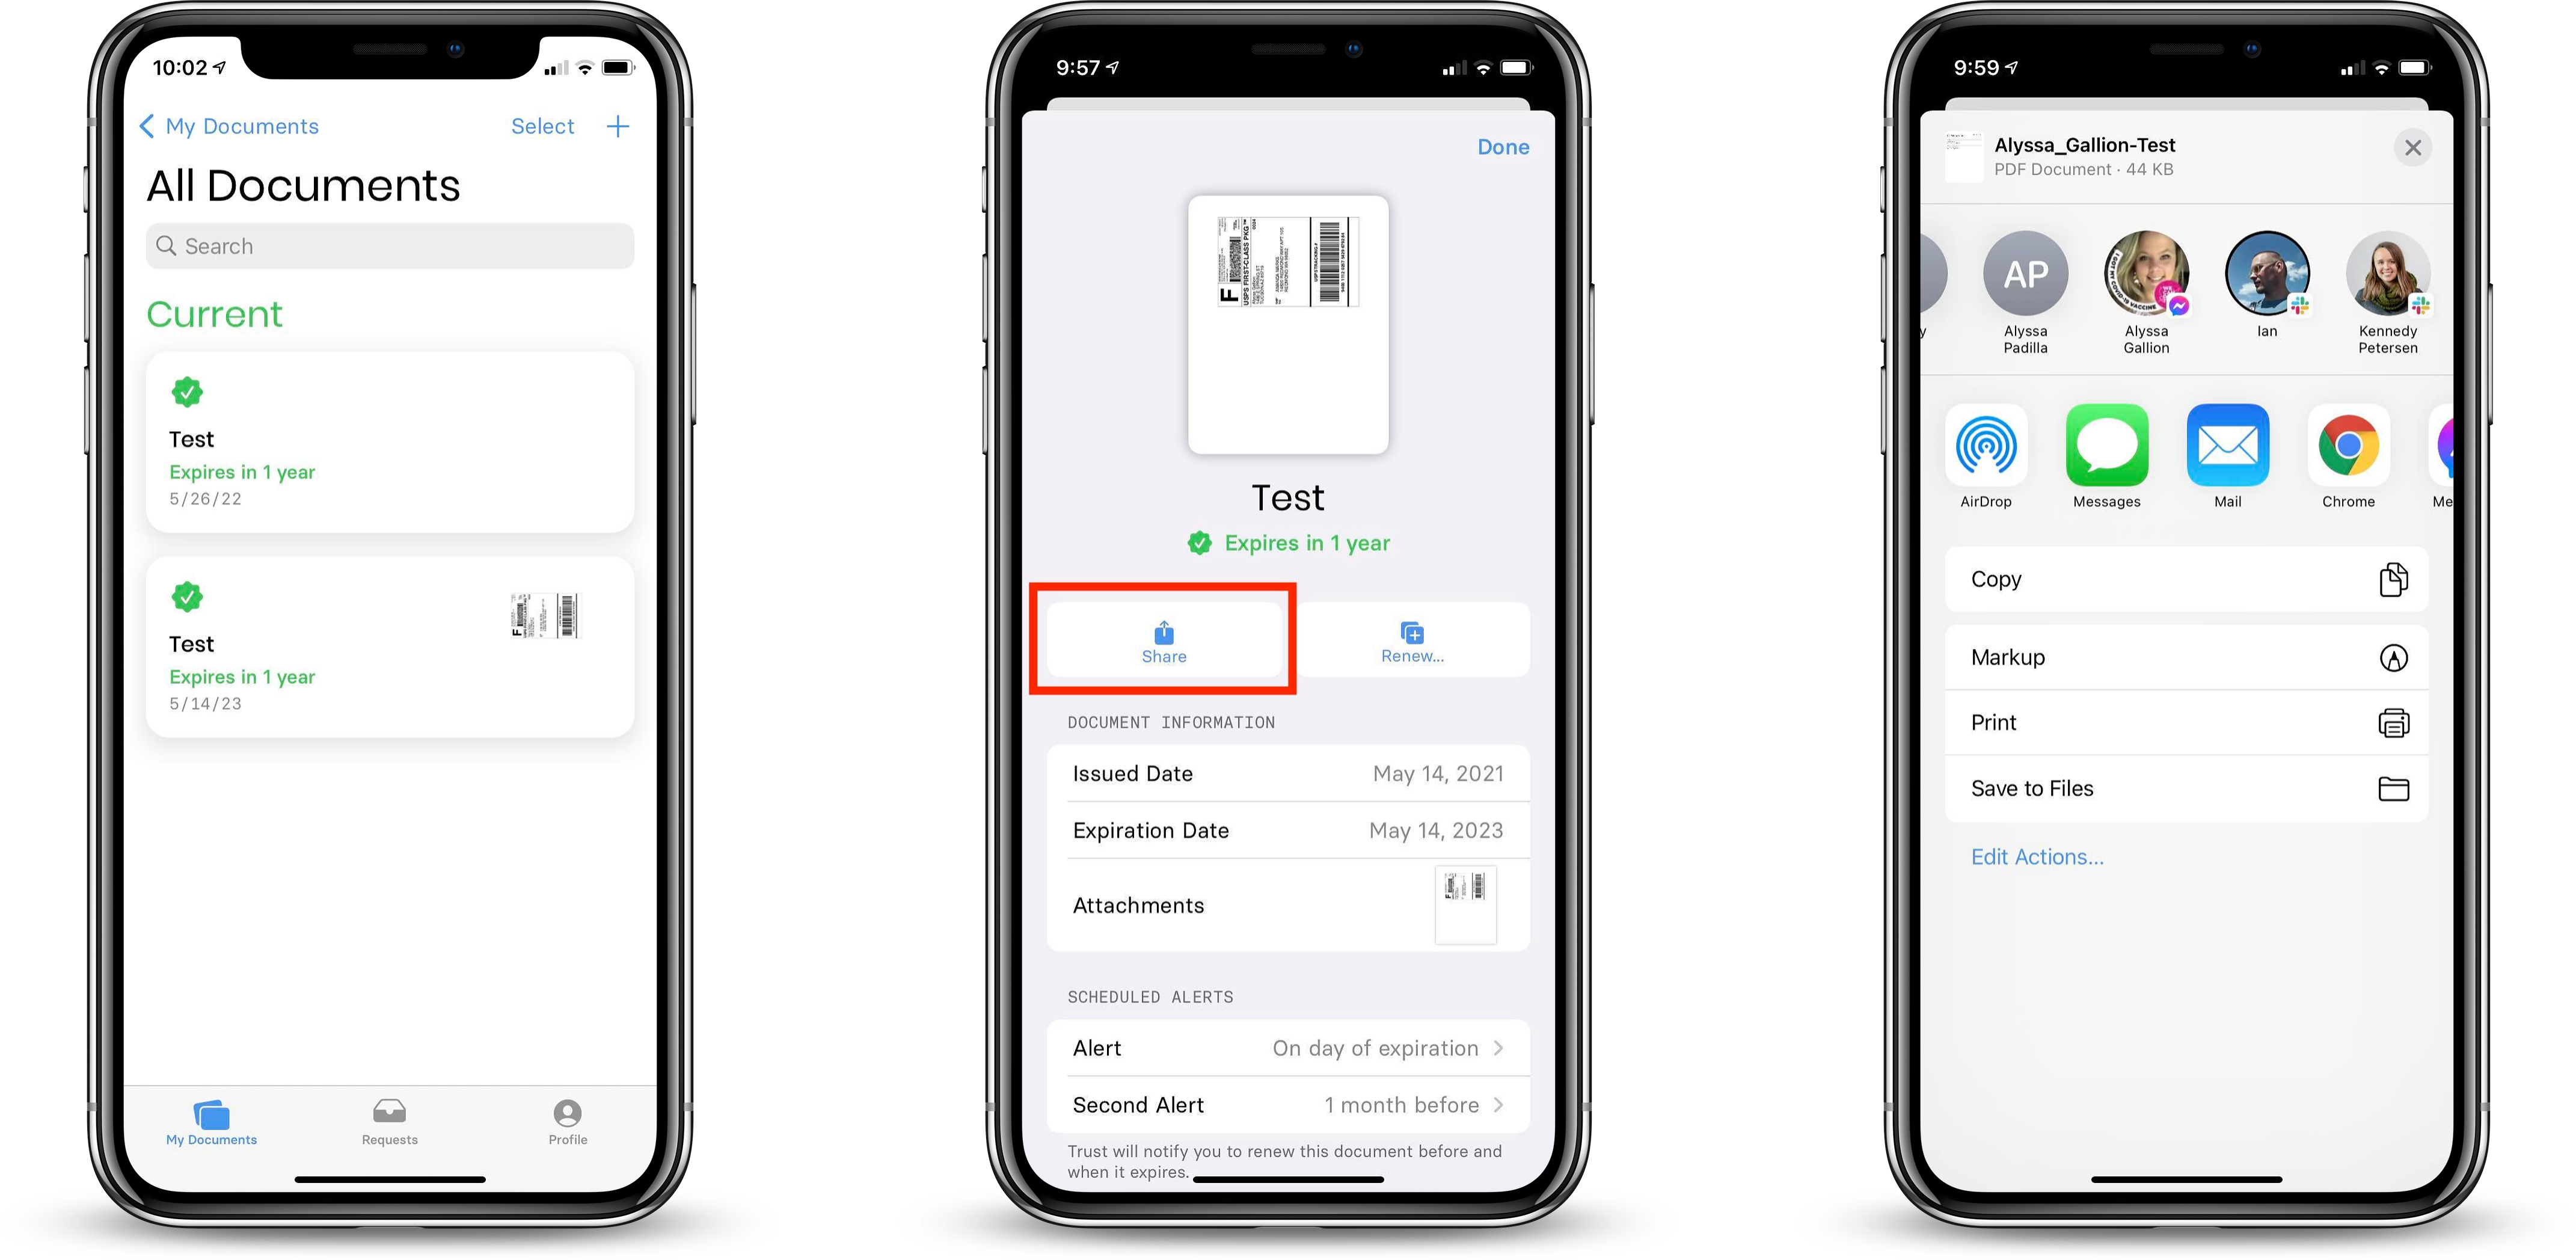
The sharing functionality allows you to send one or multiple documents to an employer or facility. You can share your documents in the following formats: SMS message, Facebook Messenger, email, or airdrop. Note: You must have these apps installed for them to show as sharing options.
Renewing Documents
To renew a credential, tap the Renew button and upload the latest version of your credential. You will see a confirmation pop-up appear and have the ability to remove the old credential if you choose.
Archiving Documents
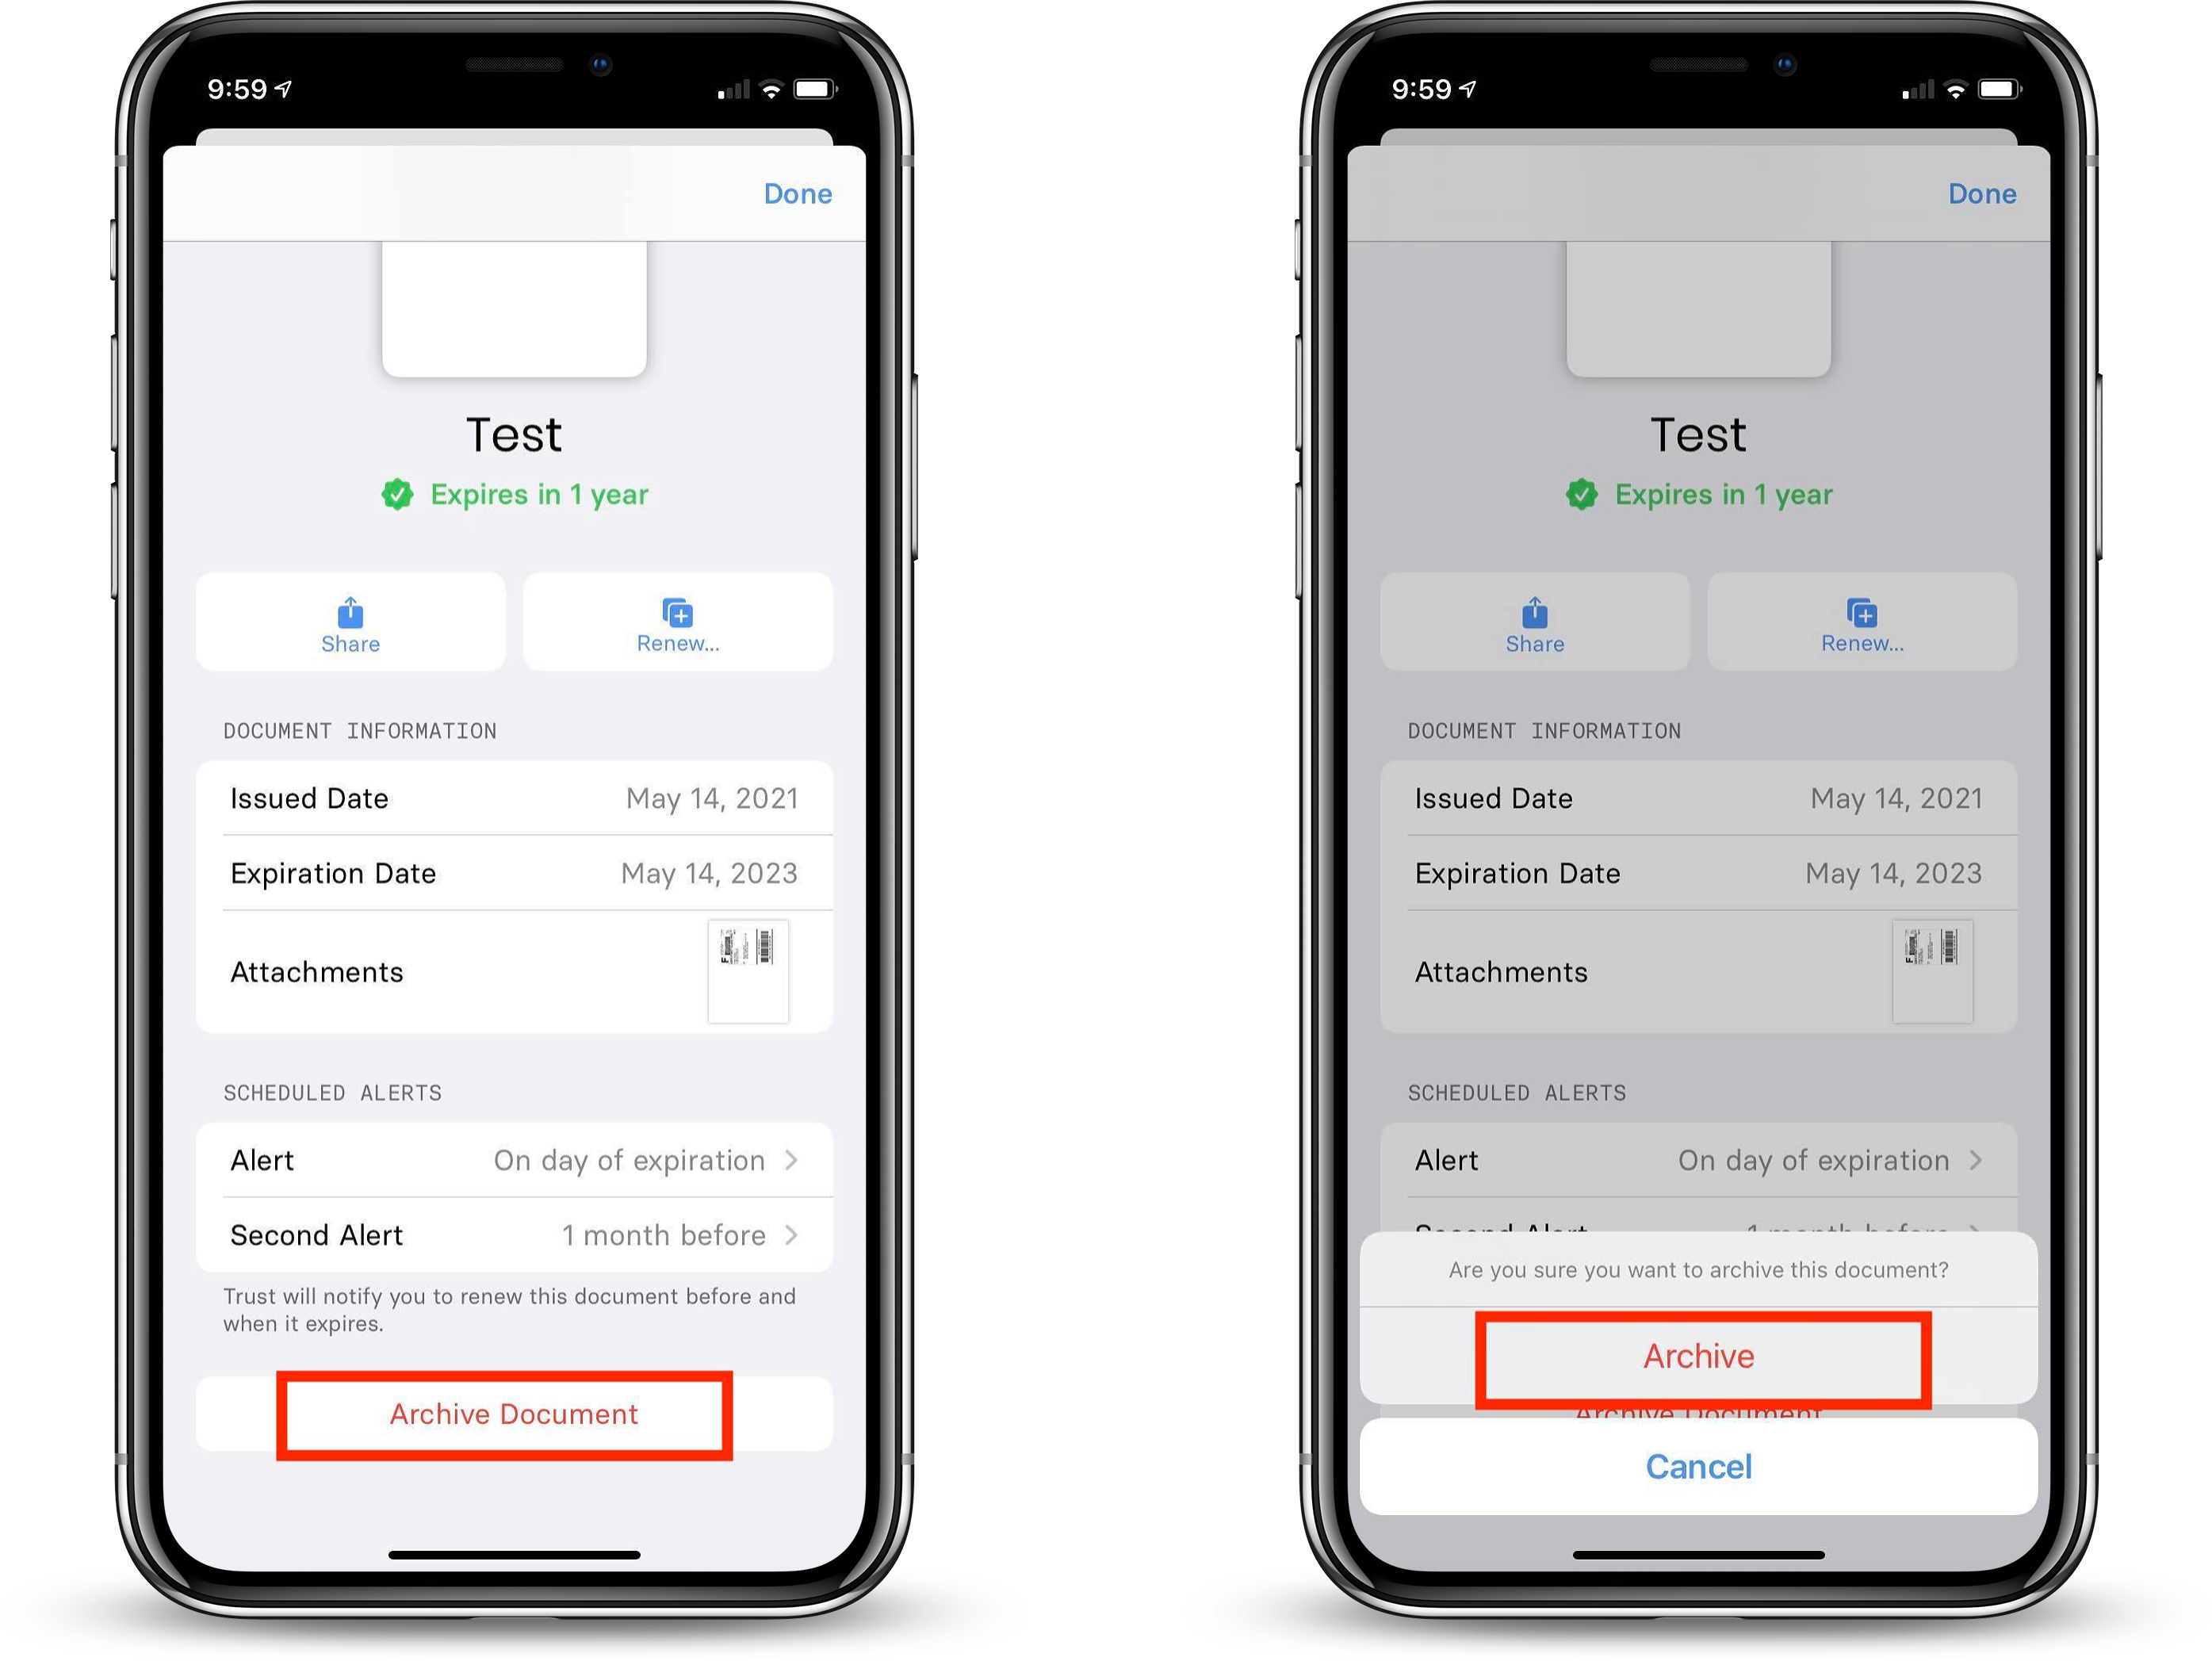
To archive documents, open the document card you would like to file away. Next, scroll to the bottom of the card and tap the Archive button.
Editing Documents
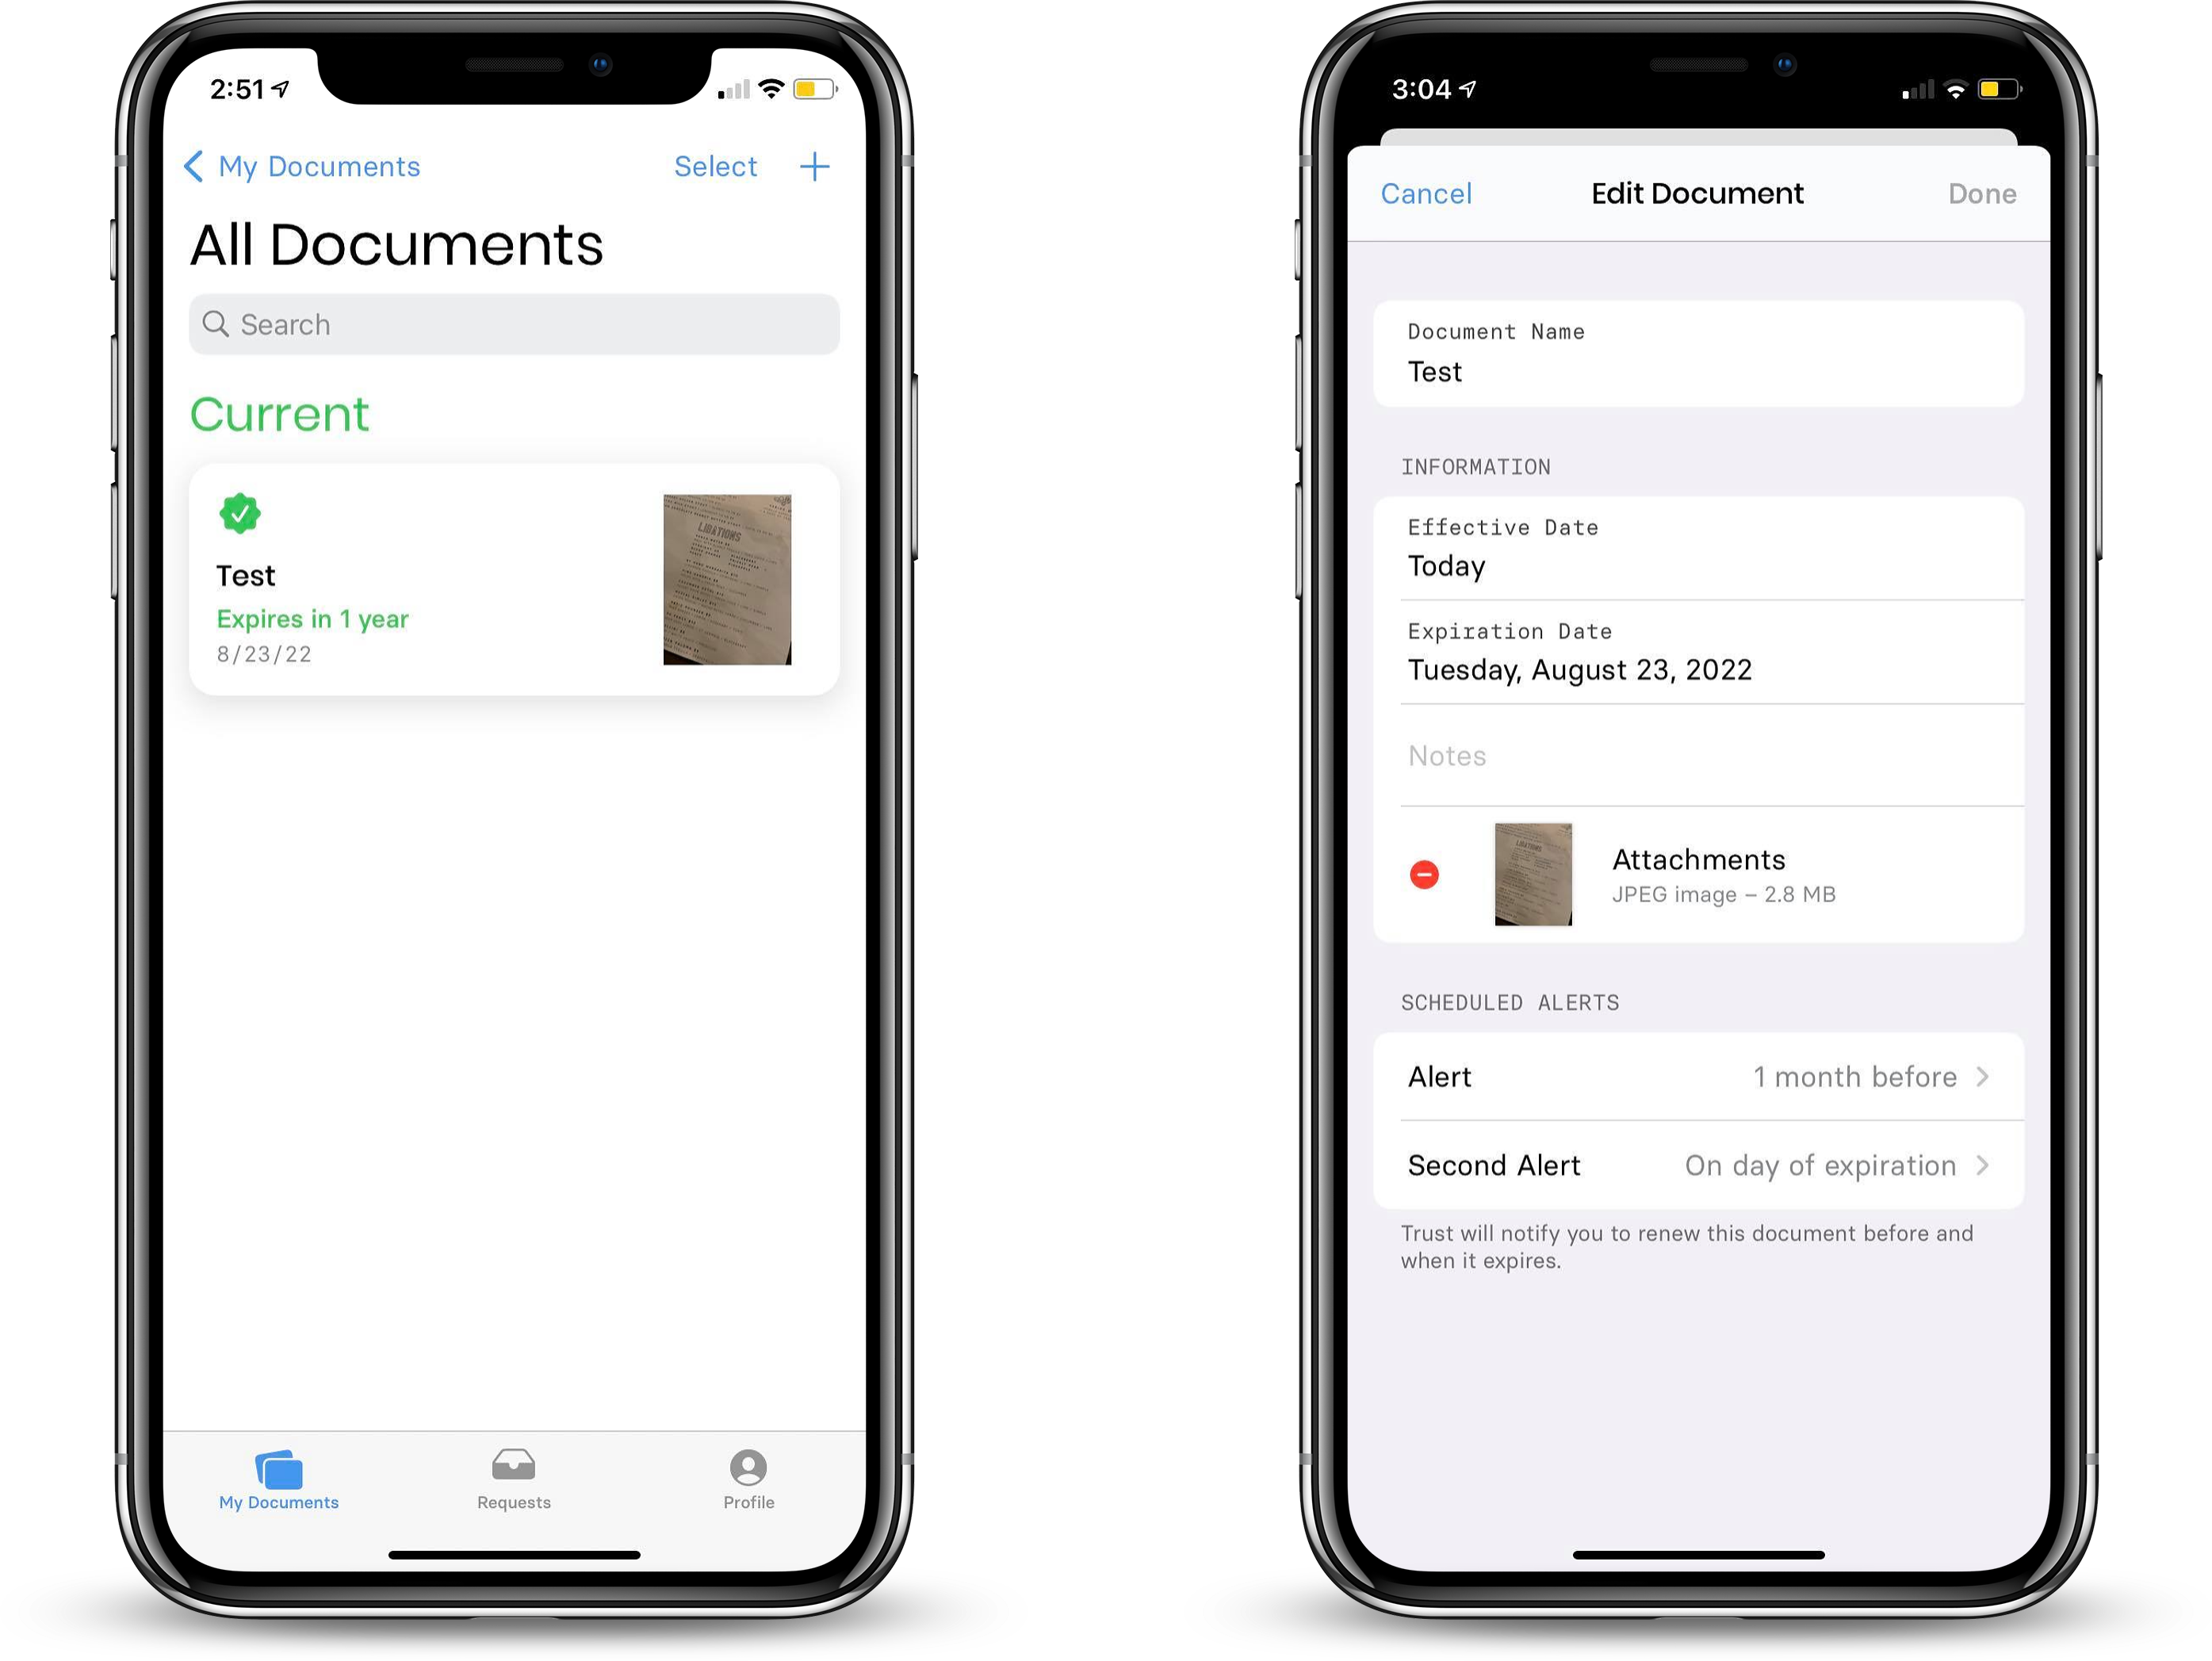
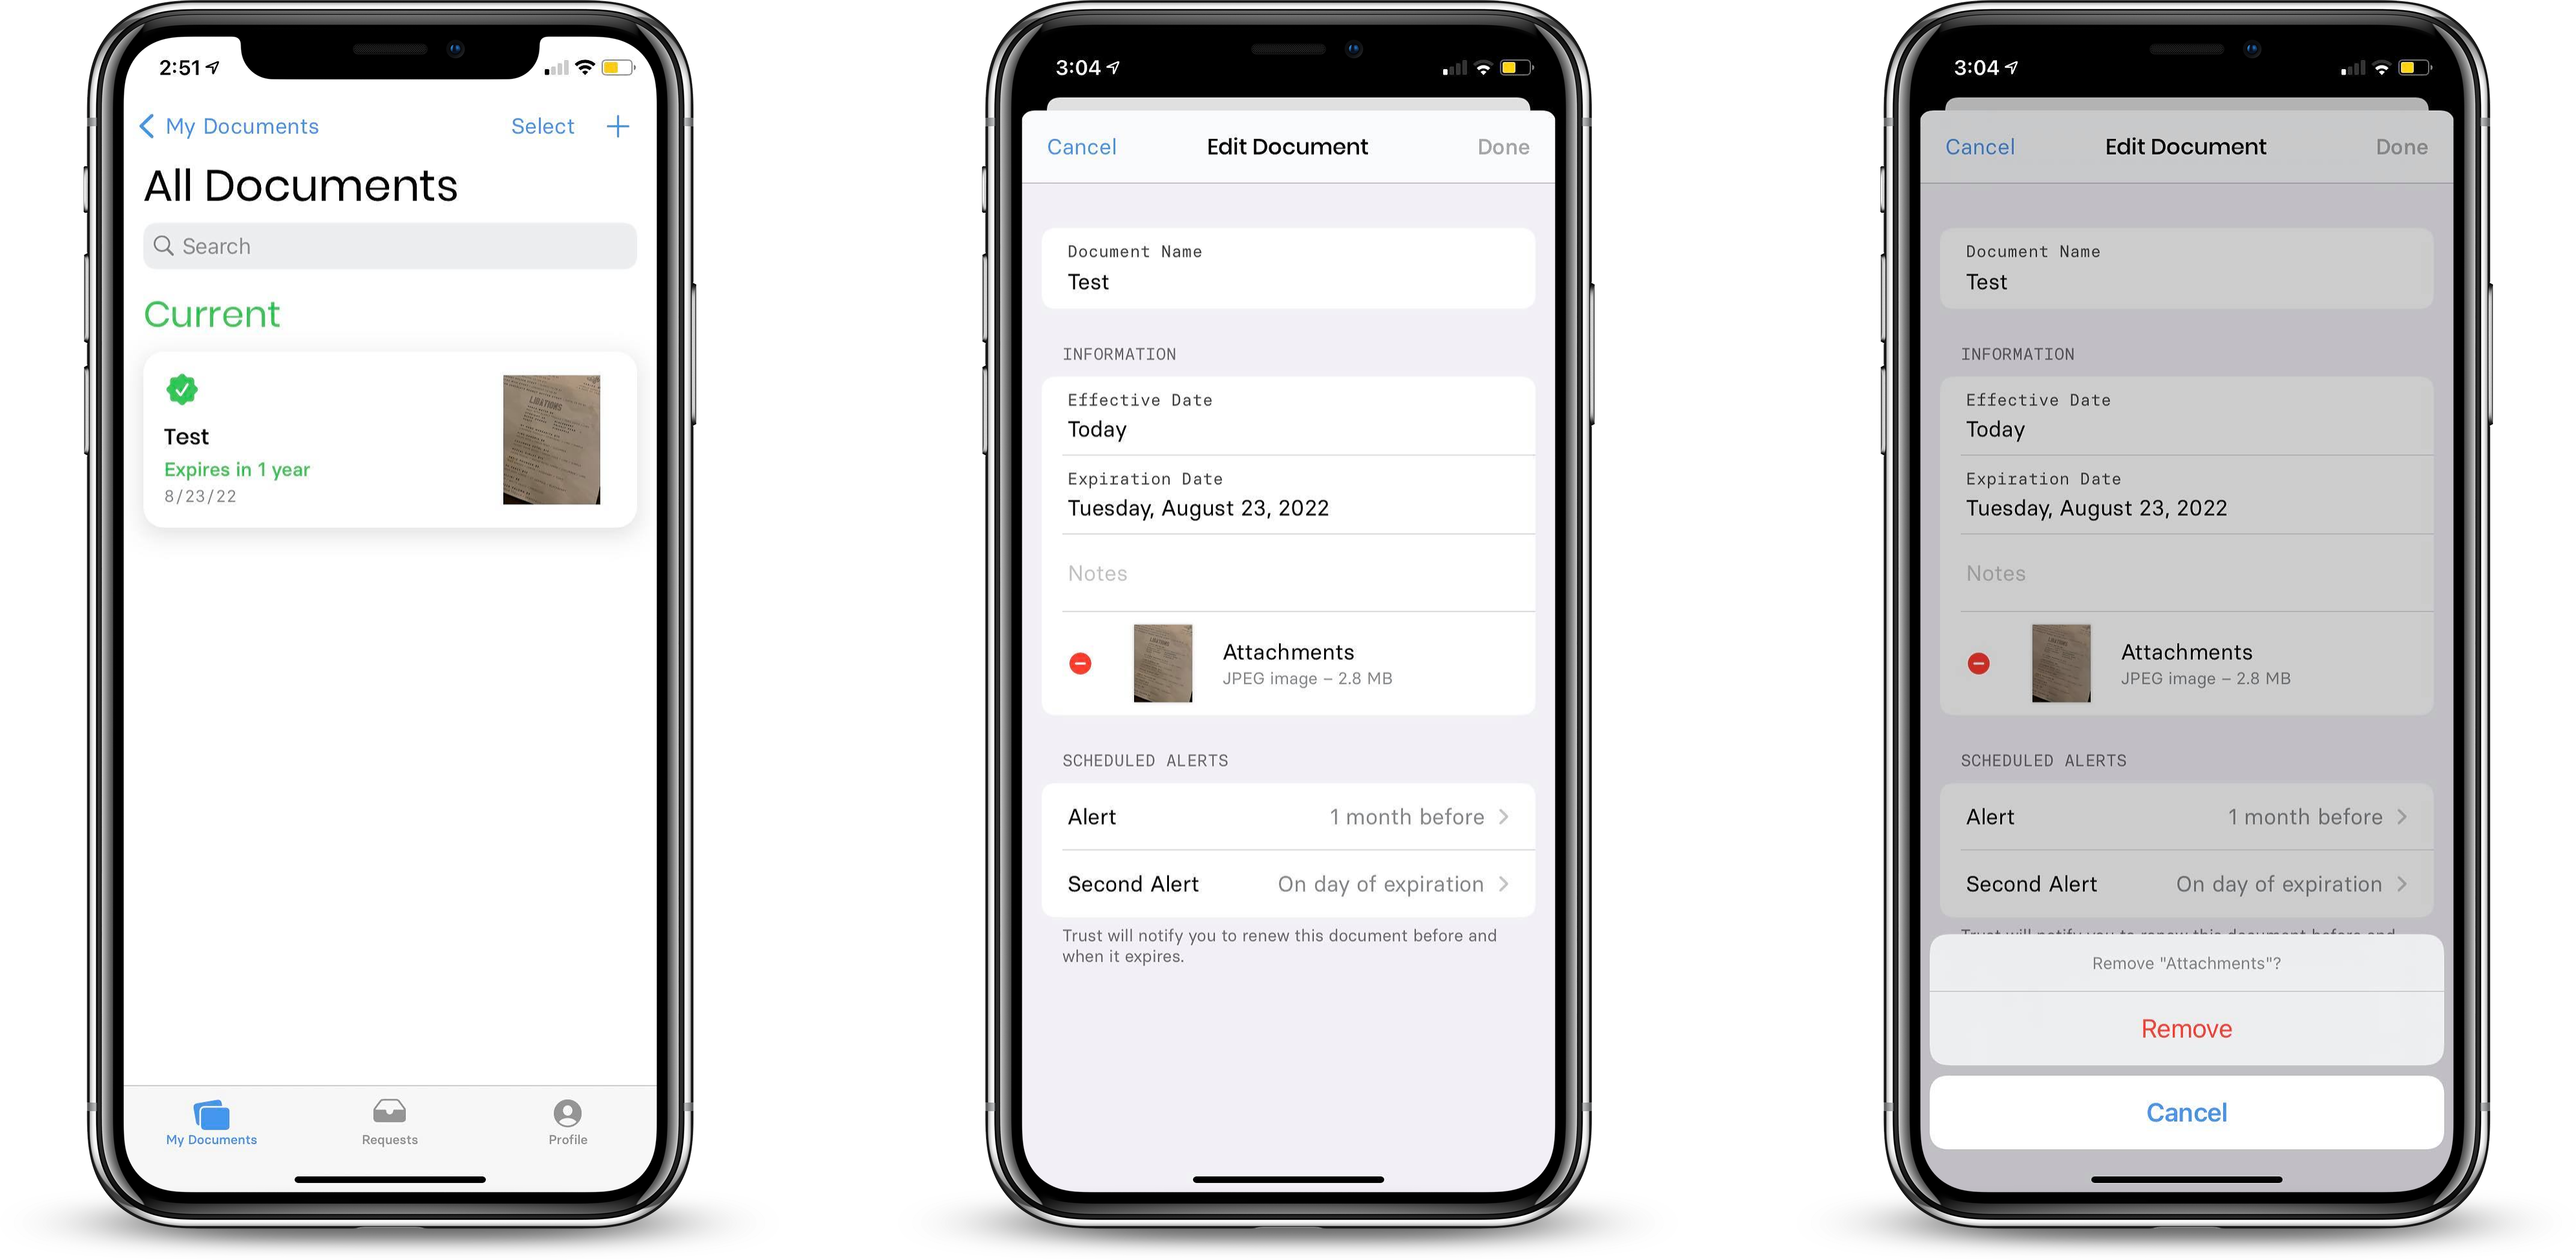
To edit a document, navigate to the All Documents screen using the navigation bar and select the document card you'd like to edit. Next, tap the Edit button. You will be taken to the Edit Document page where you can make edits to the fields displayed as well as remove and replace documents. Once edits have been made, make sure to save changes by tapping Done.
Deleting Document Attachments
To delete a document attachment, navigate to the document you would like to edit and tap the Edit button. Next, tap the red delete button next to the attachment you would like to remove, and then tap the Remove button that appears. Note: Attachments are not required, but they are recommended.
Requests
The Requests section of the app allows you to respond to document requests from organizations you work with.
Responding to Requests from Organizations
When an organization has requested a document from you, an email will appear in your inbox that looks like this:
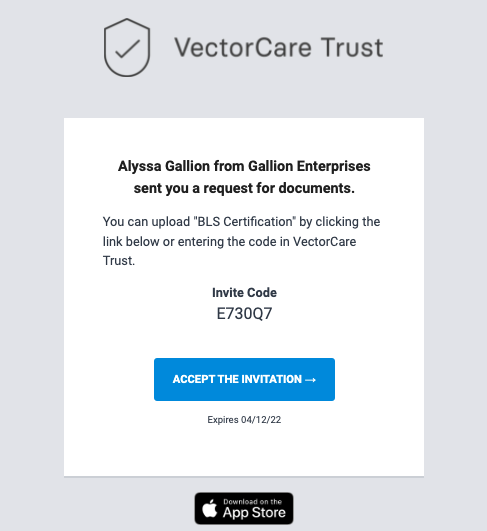
If you click the Accept the Invitation button you will be taken to the web app. If you would prefer to use the iOS app to upload your document, open the app on your device and follow the instructions below.
To respond to a request from an organization, tap the Requests icon in the tab bar at the bottom of the screen. Next, tap the document request you would like to respond to.
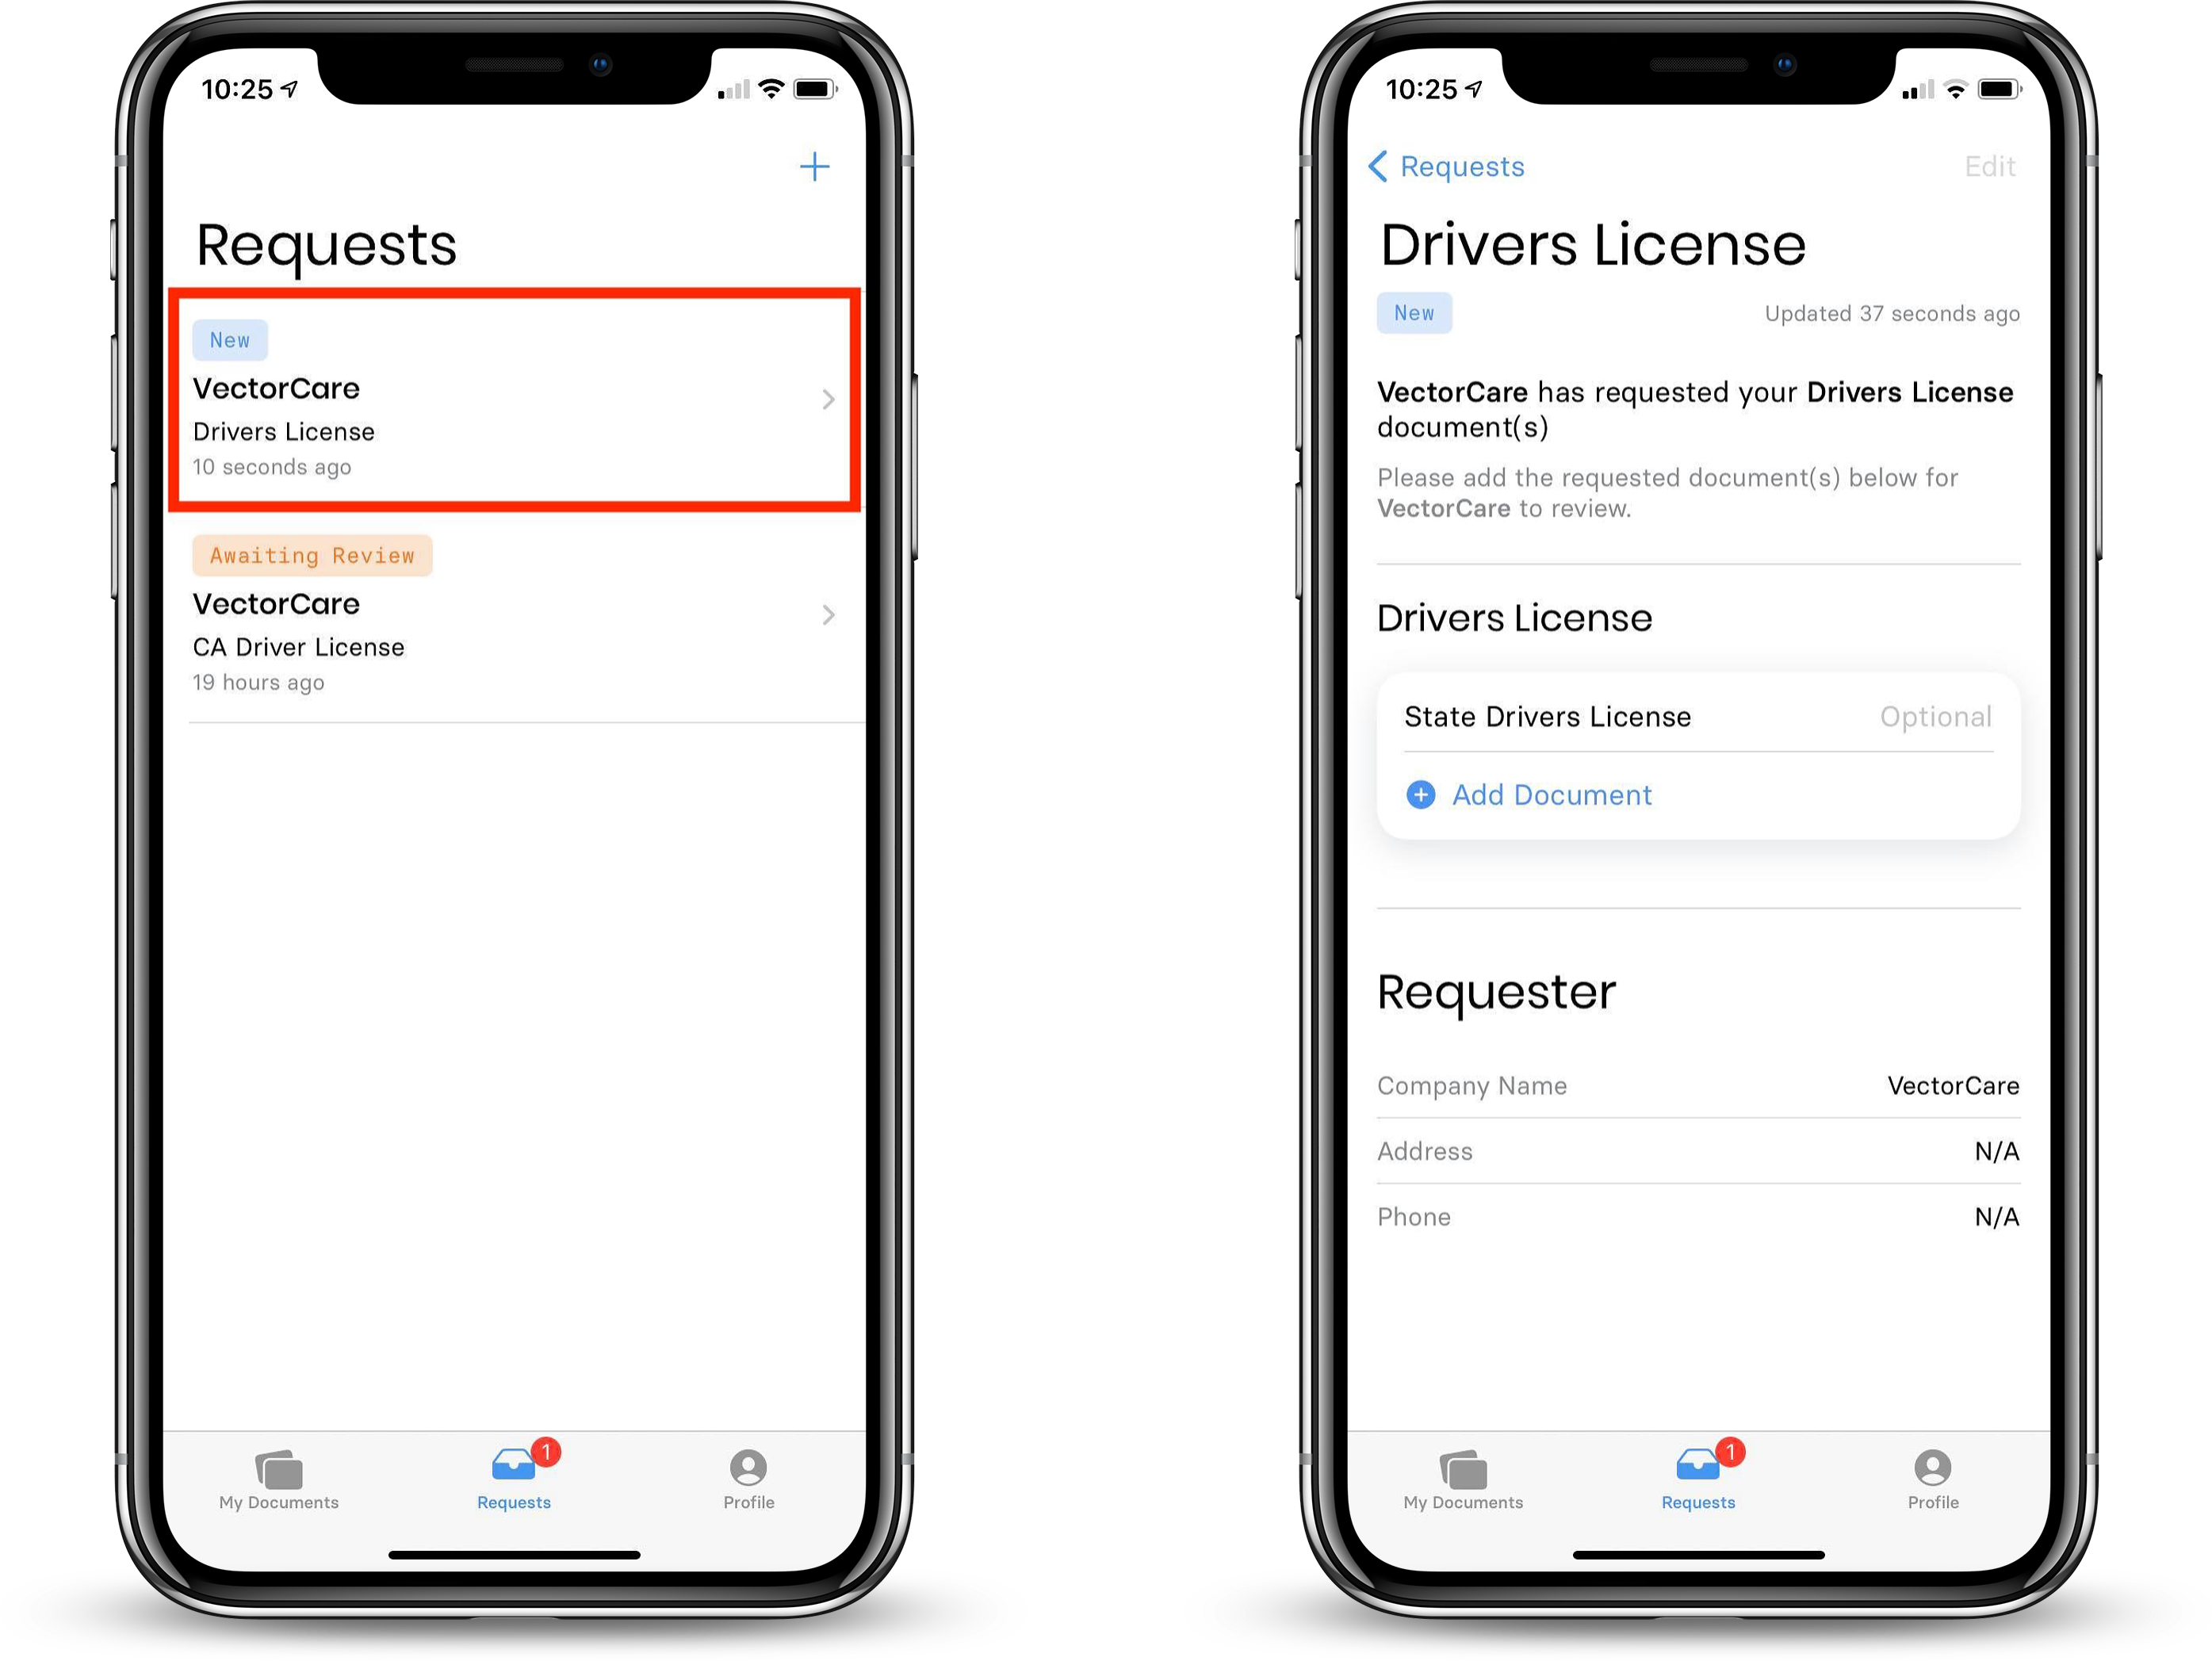
Once in the credential request, tap Add Attachment.
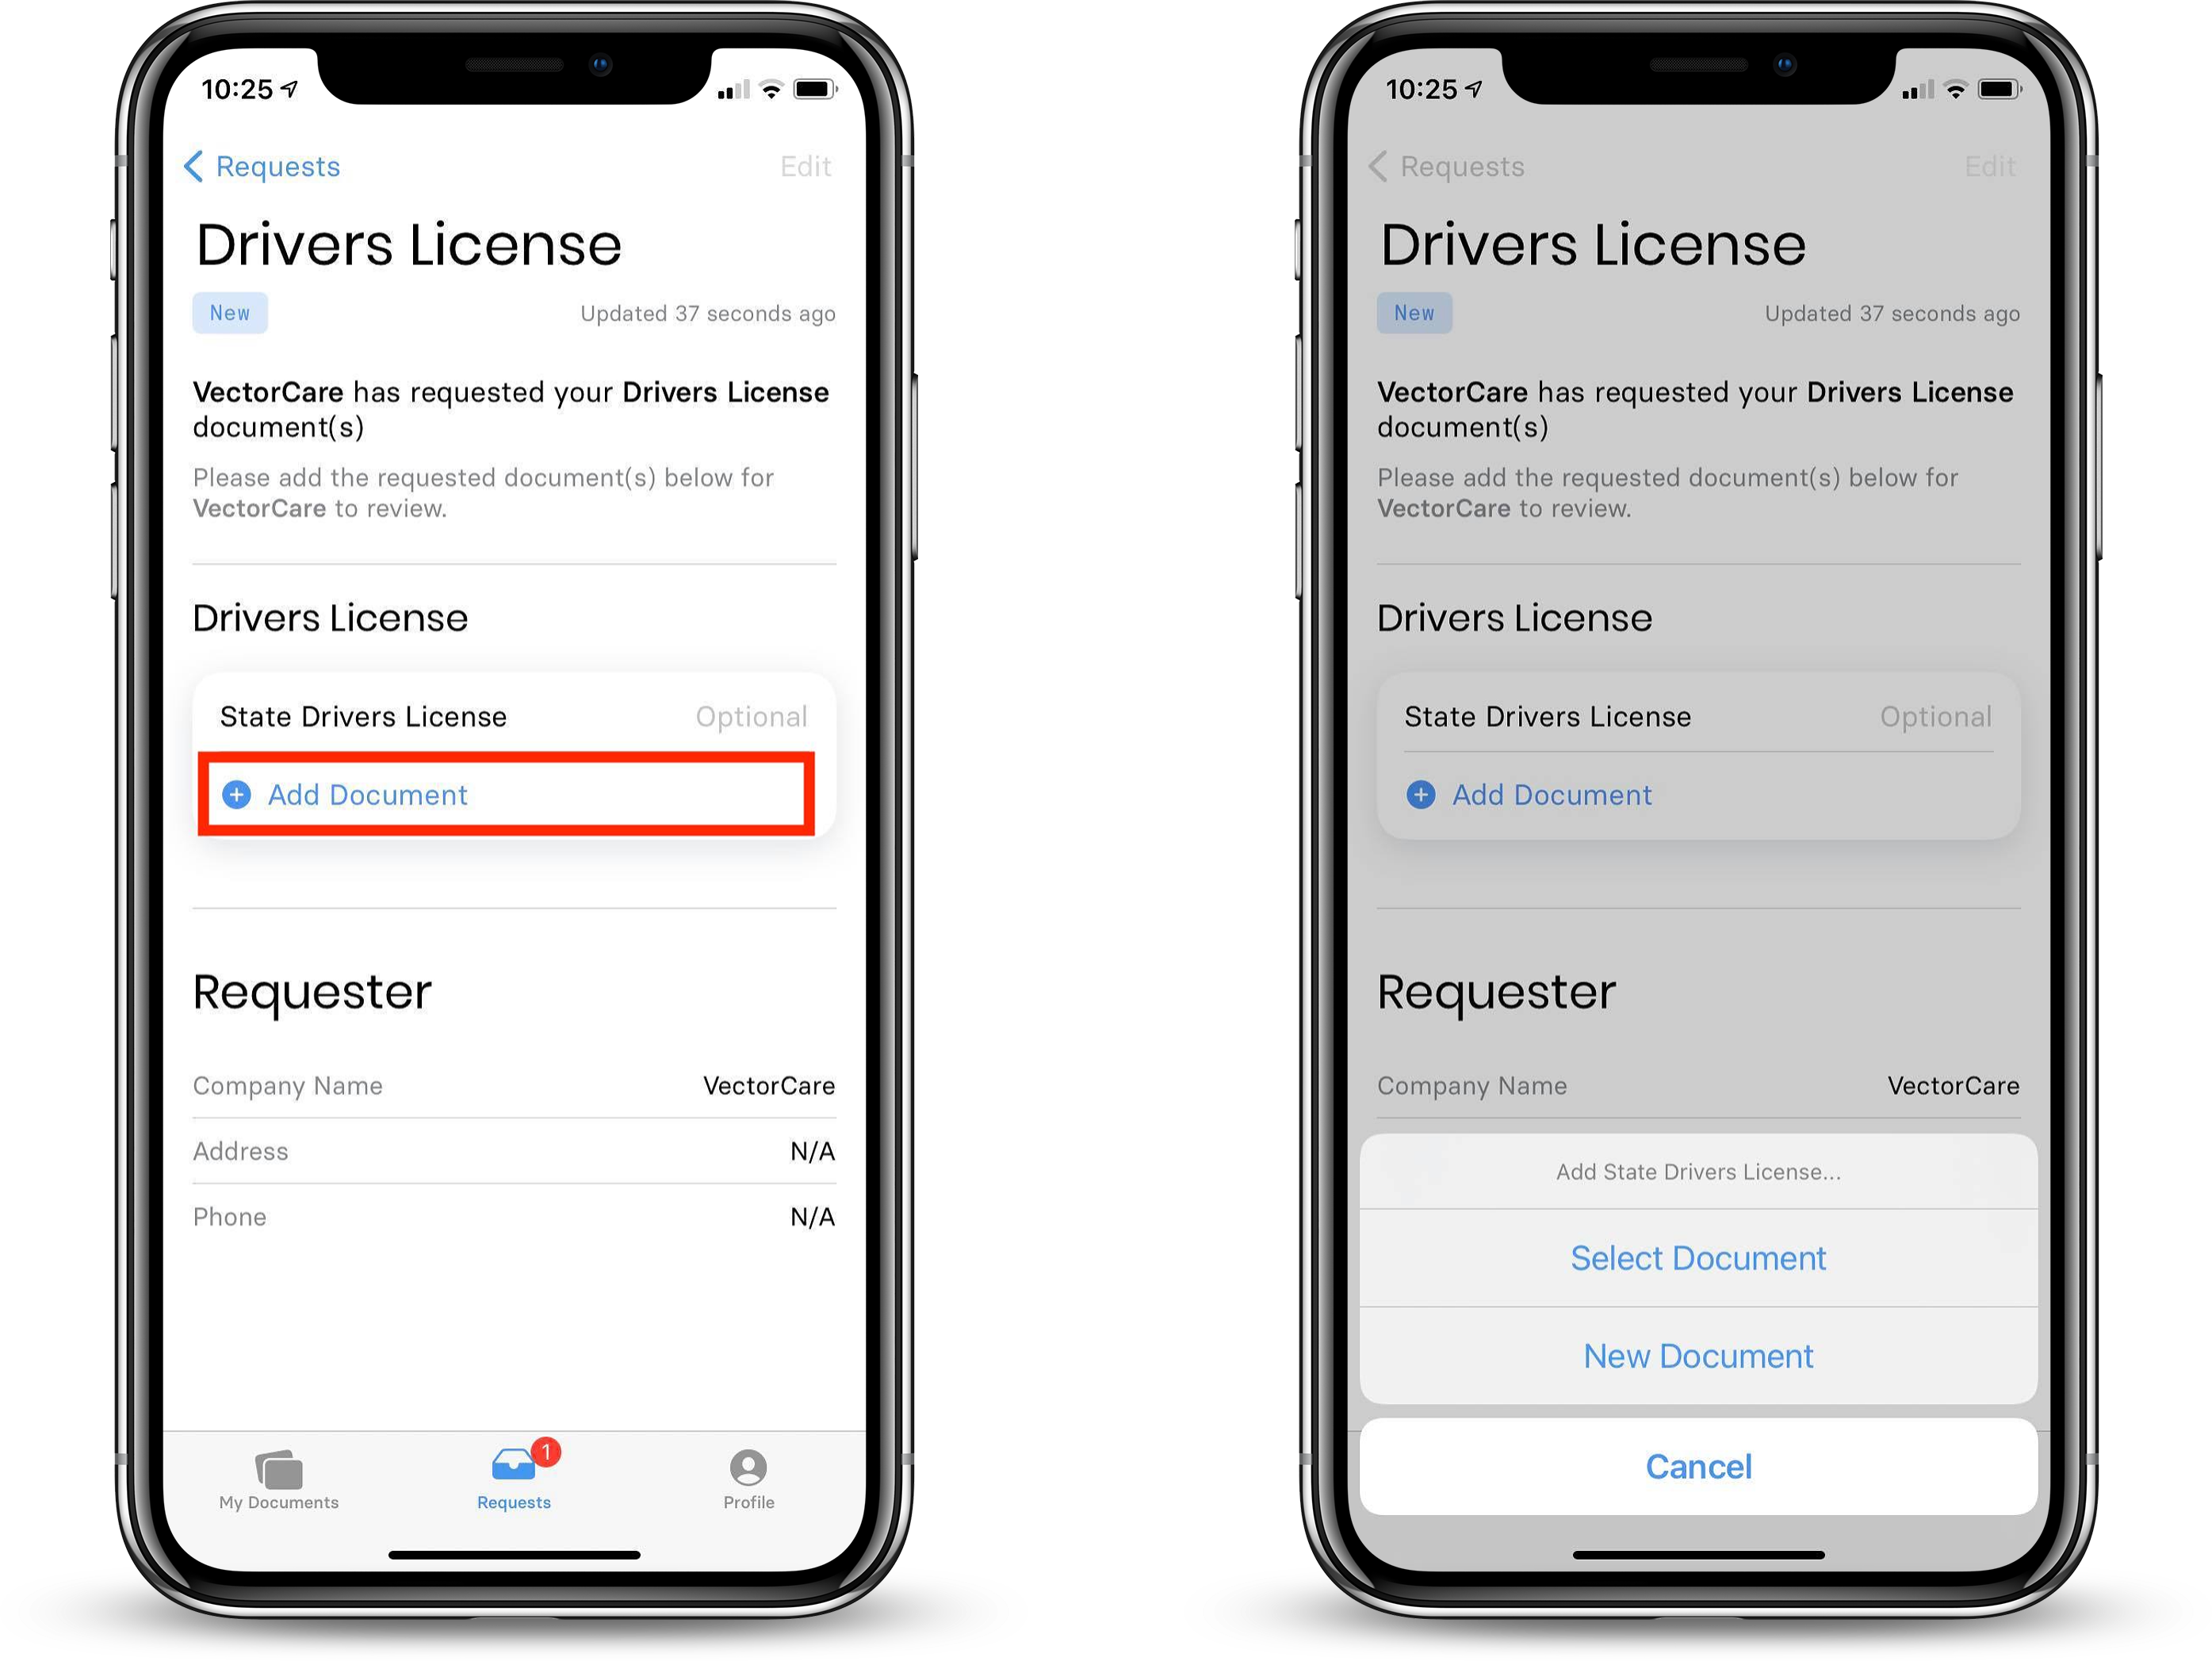
Next, tap one of the following:
Select Document: This allows you to choose an existing document from the My Documents section.
New Document: This allows you to upload a new document, which will be stored in your My Documents
Selecting an Existing Document
If you would like to select an existing document from your My Documents section, simply tap Select Document and tap the document you would like to include.
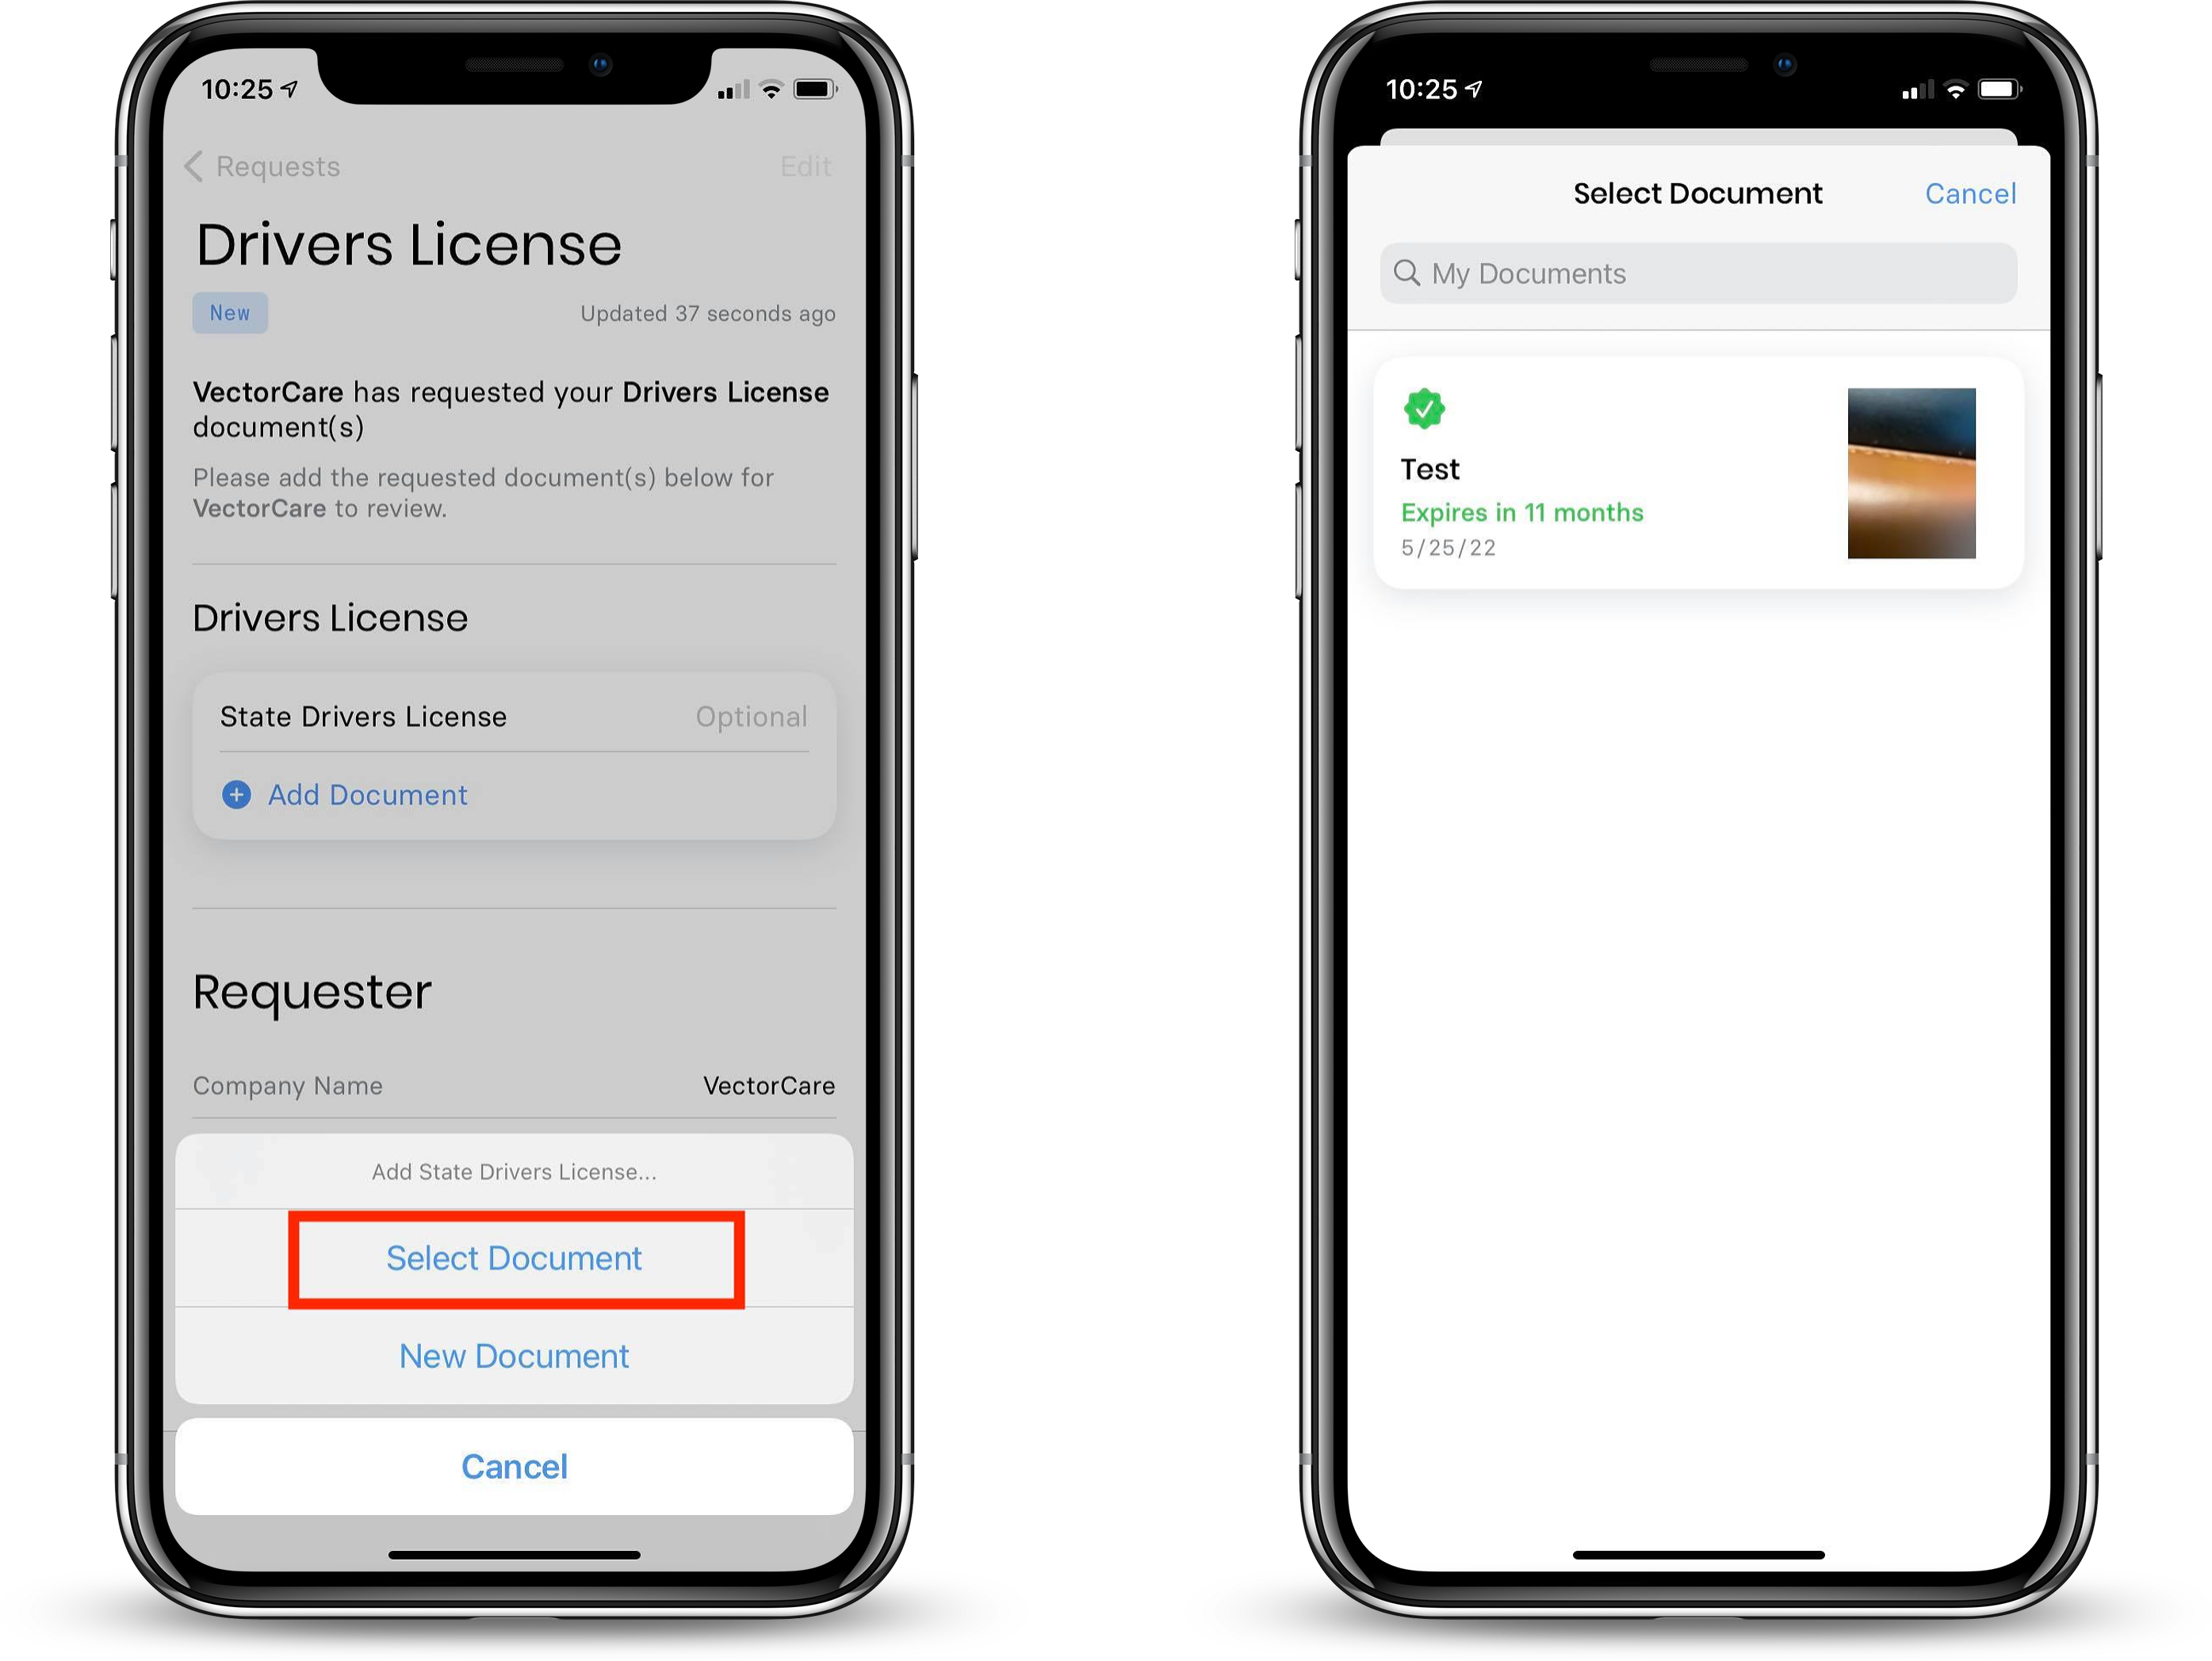
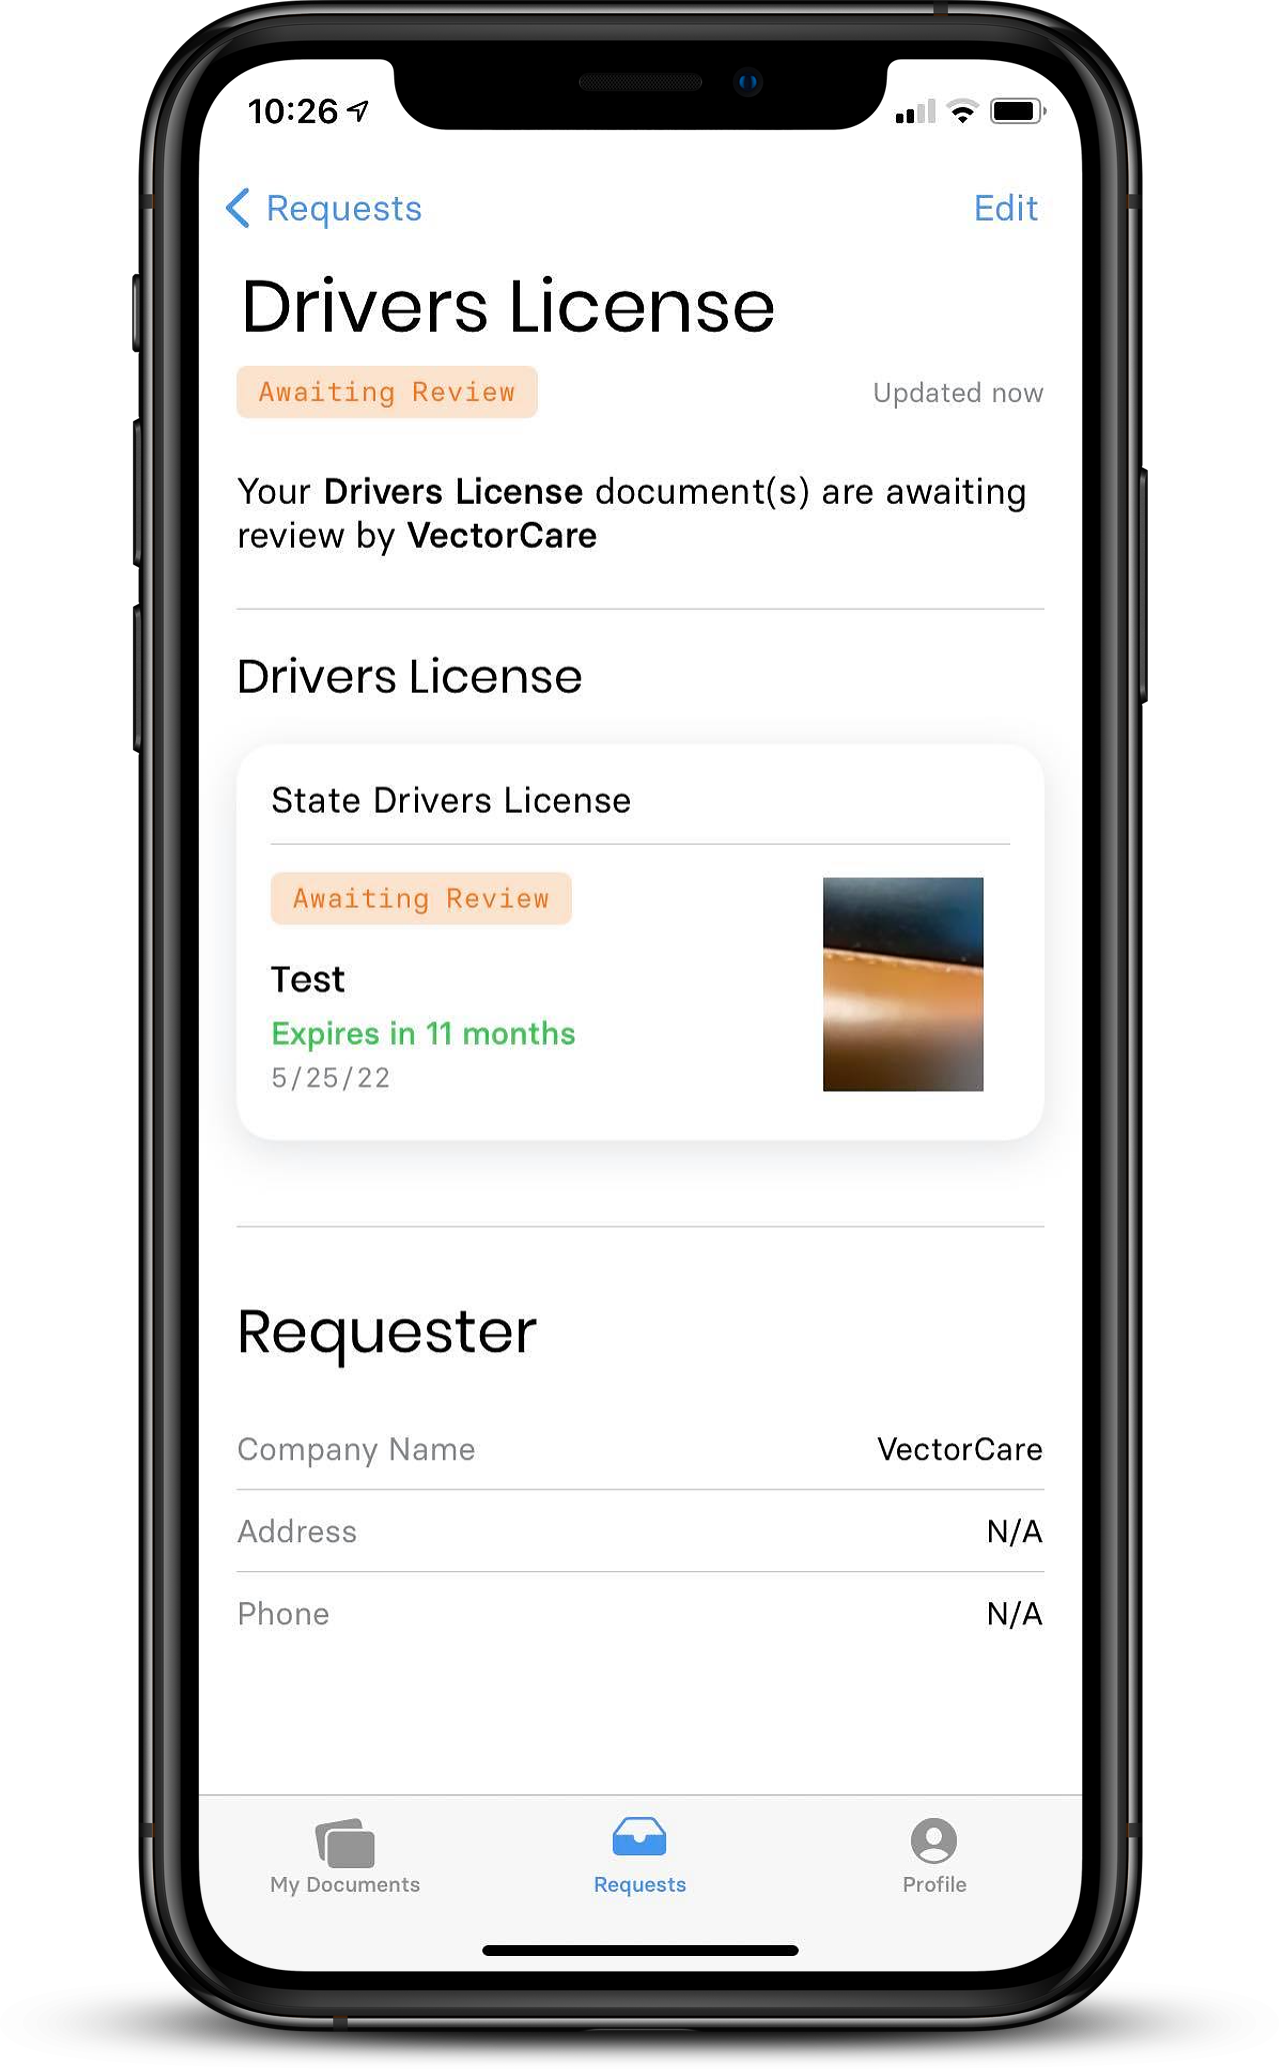
The request response will be changed to Awaiting Review.
Uploading a New Document
If you would like to upload a new document, simply tap New Document and follow the instructions outlined in this section: Adding New Documents.
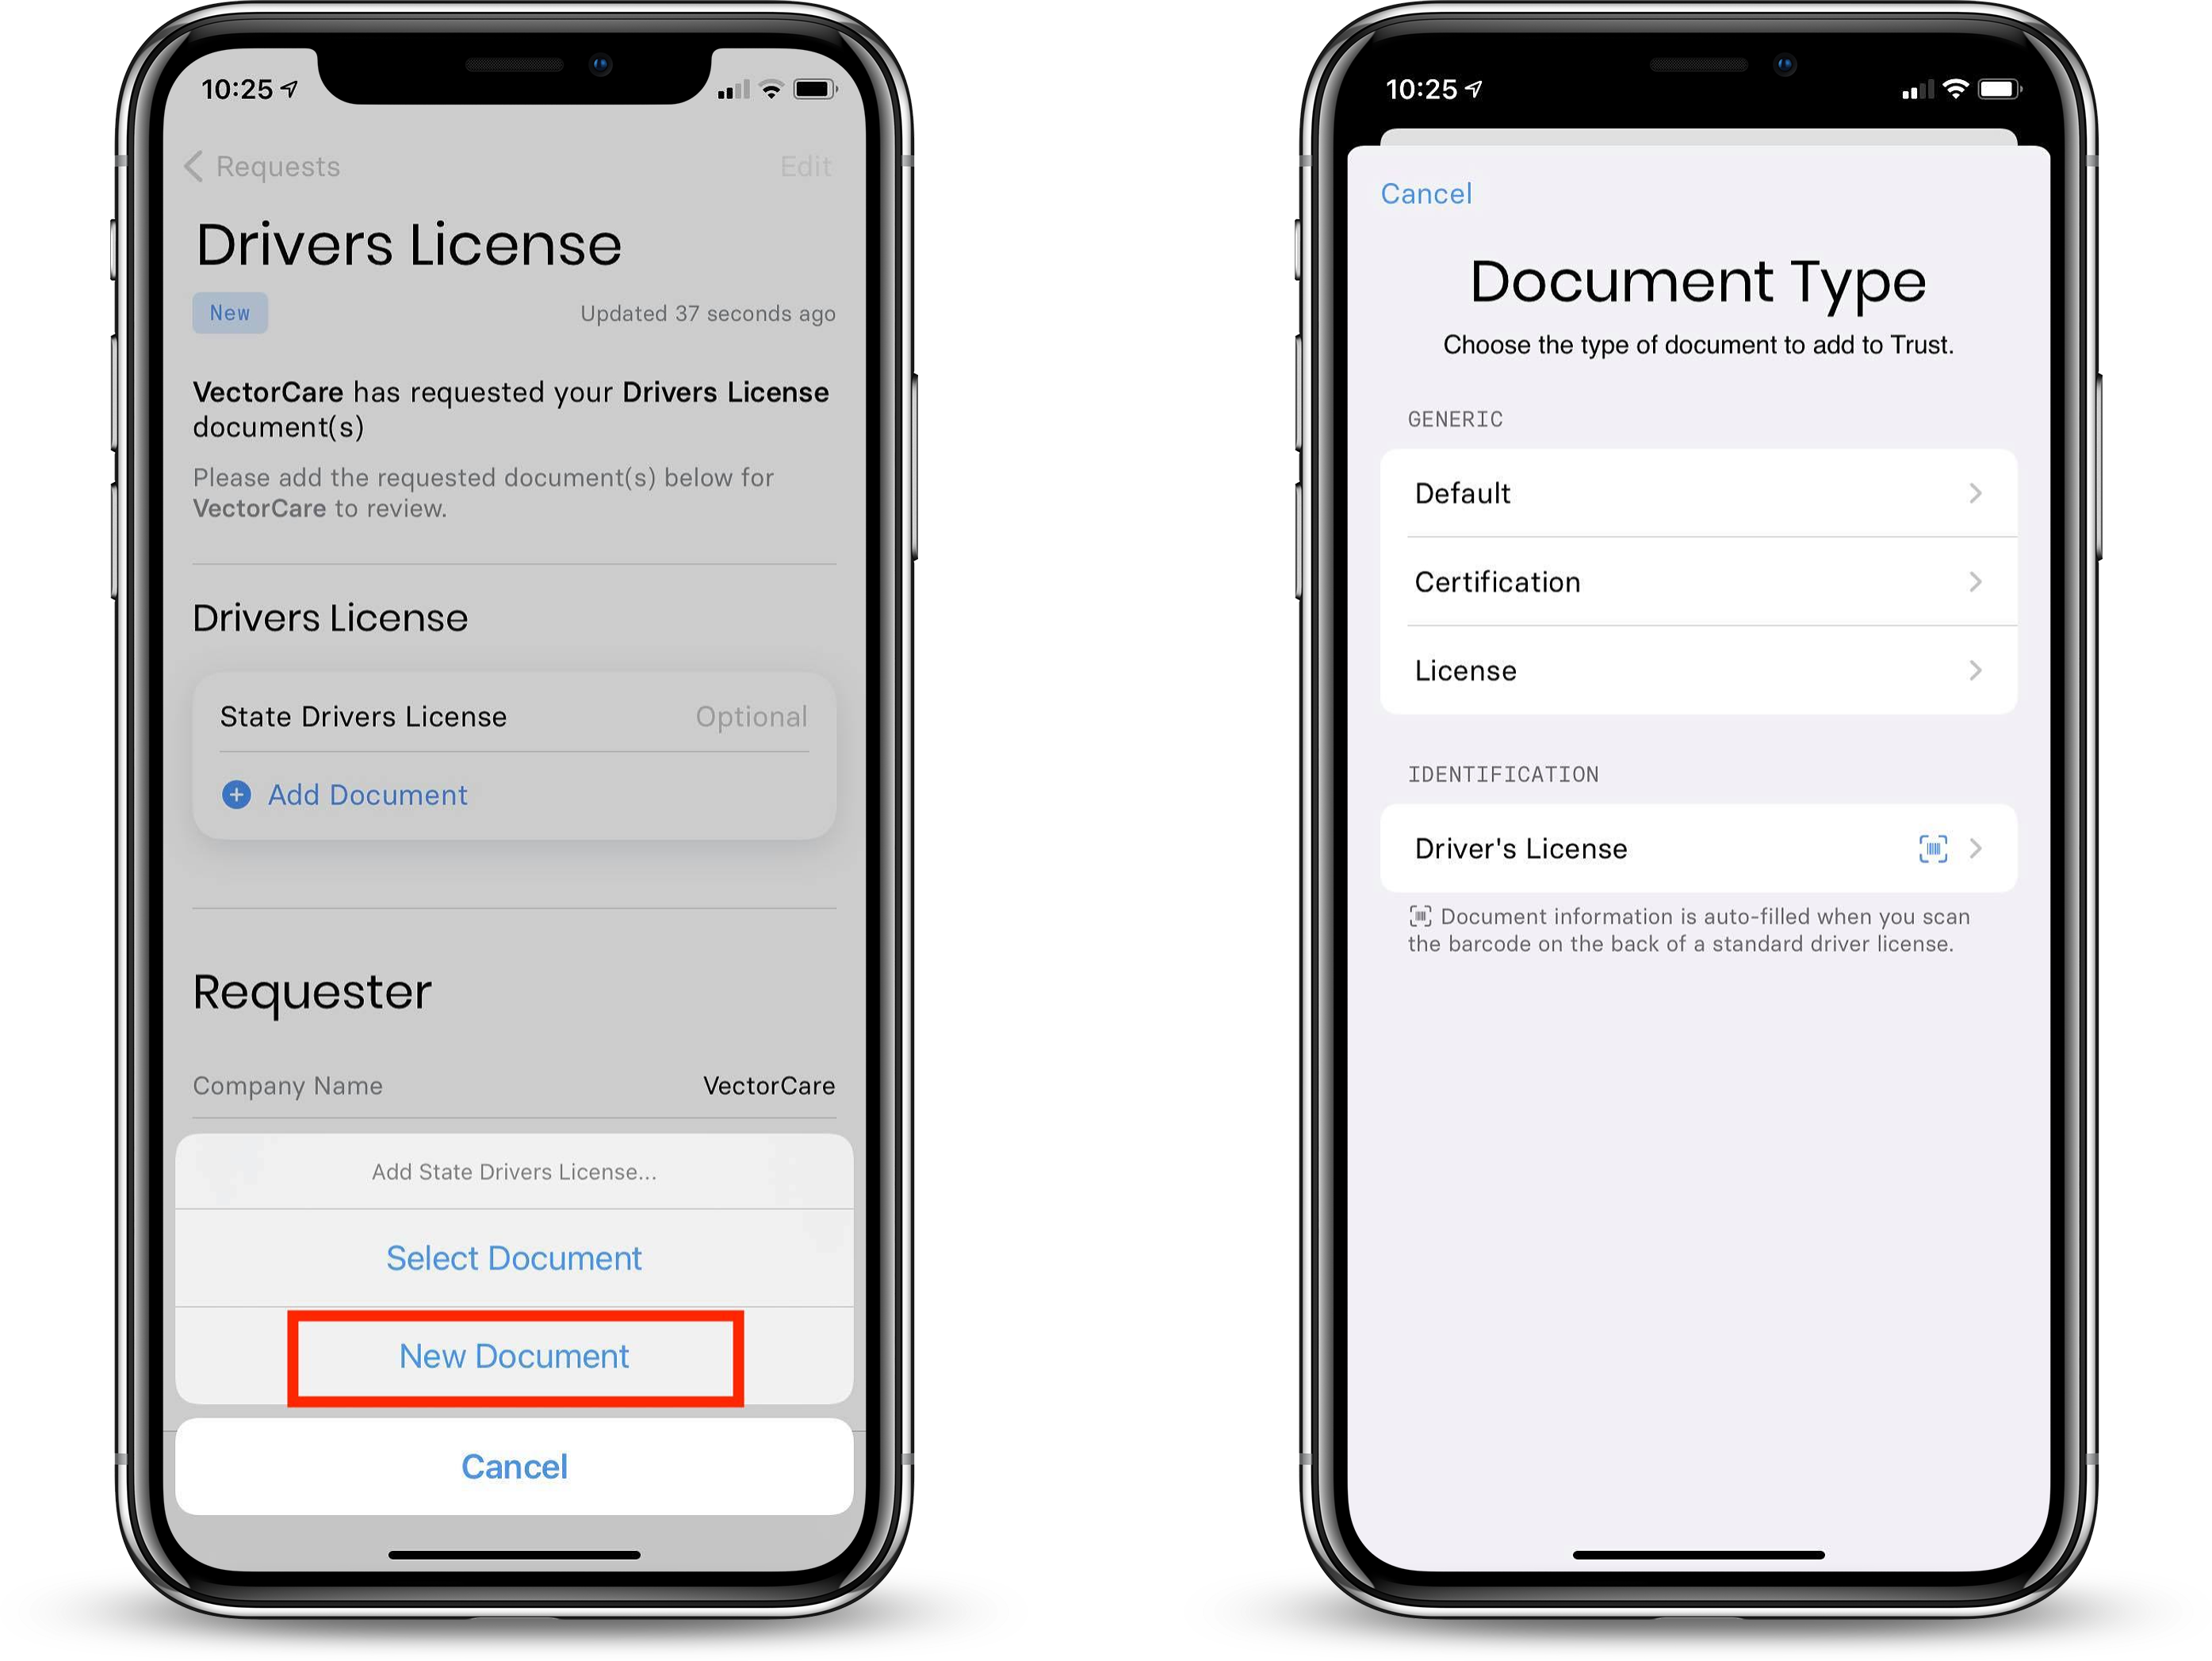
Once the new document has been uploaded, the request response will be changed to Awaiting Review and the new document will be added to your My Document section.
Settings
Profile Tab
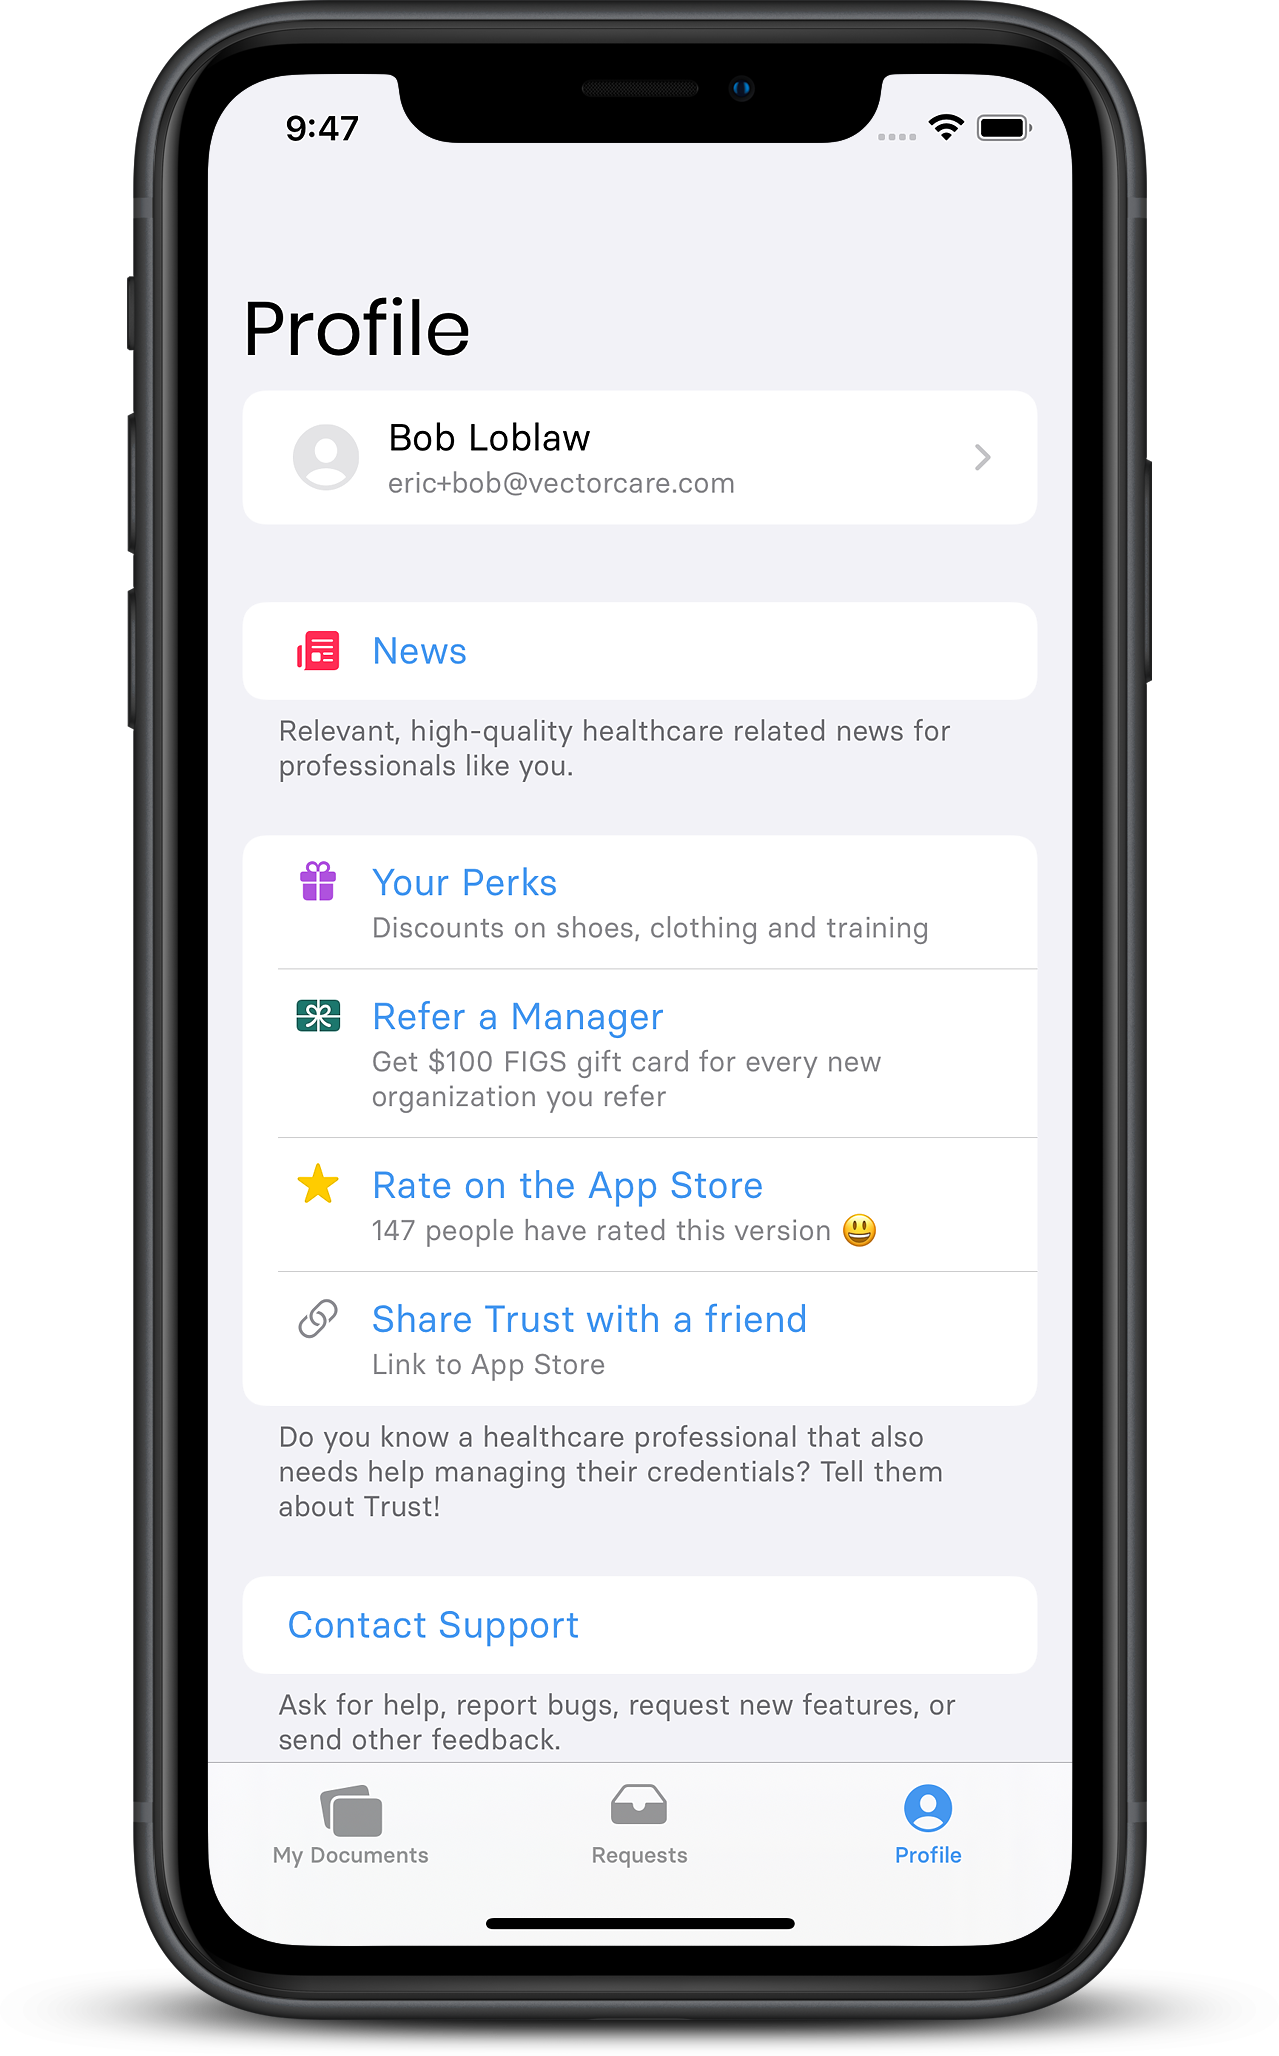
Inside the Profile tab on the tab bar, users can:
News (BETA): In this section, there will be an industry newsfeed with the latest and greatest articles. Currently, you can provide your feedback for the type of news you would like to see in the future.
Perks: Promotions, discounts, and other perks will be listed here for healthcare professionals. You can explore perks here.
Refer a Manager: You can refer your manager or organization and when they successfully create an account, you will receive a $100 gift card to FIGS.
View the Account details you are logged in with. This includes email, first name, and last name.
You can recommend VectorCare Trust with Rate on the App Store
Share Trust with a Friend via Facebook Messenger, text message or Airdrop
Send support tickets and feedback to VectorCare Support by tapping Contact Support
Note: Responses to support tickets will be direct to the email address associated with the user’s account and take up to 1 business day to receive a response.
Terms of Use include the user agreement between the account holder and VectorCare
Privacy outlines how VectorCare handles your data in a safe and secure way
Sign Out of an account